How to create a video lesson
Introduction
There are six different types of lessons you can create within a course. In this article, we’ll guide you through the process of creating a Video Lesson.
When creating a video lesson, you have four upload options. You can either upload the video file directly or embed a video using a YouTube link, a Vimeo link, or any other external video code.
Step 1: Create a course
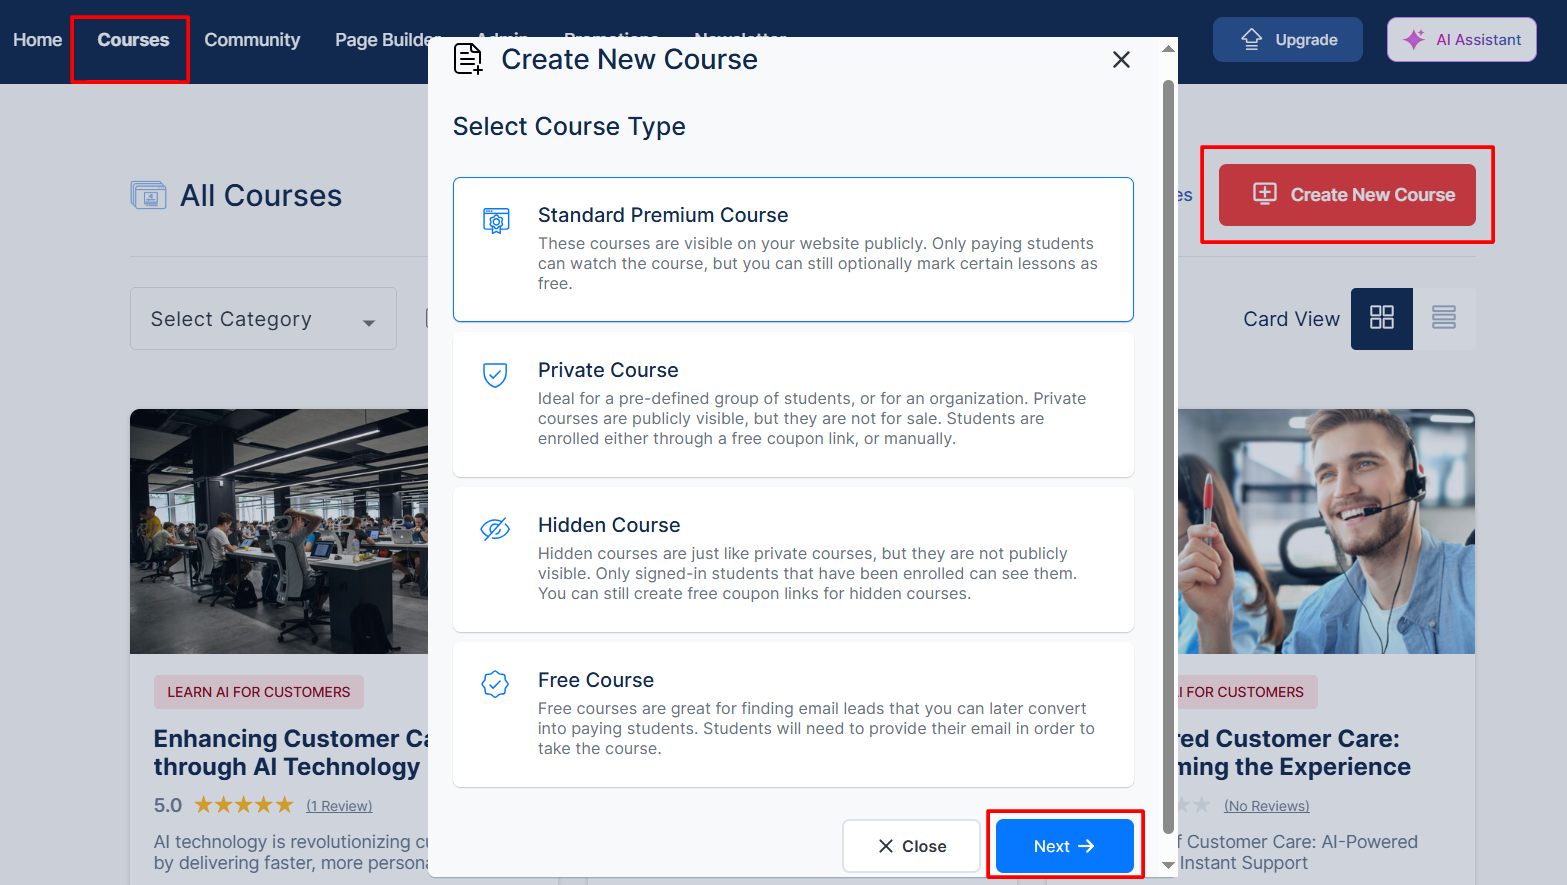
Log in to your account ⇒ click Courses ⇒ select Create New Course ⇒ choose your preferred course type (i.e., Standard Premium Course) ⇒ click Next.
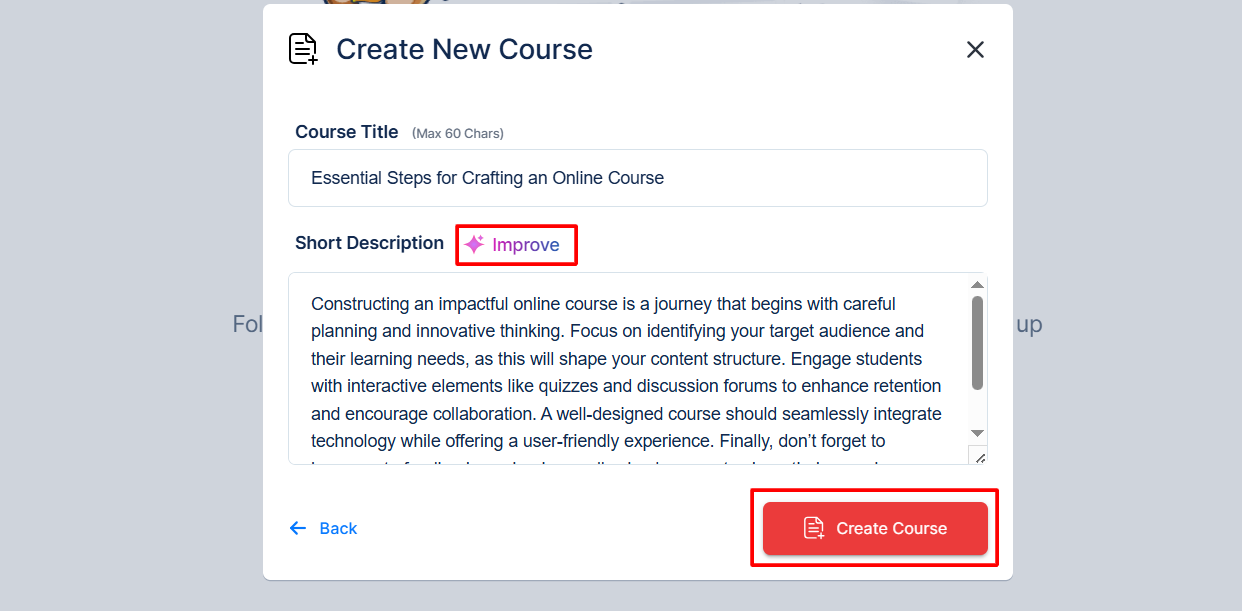
Every course you publish online must have a title and a brief description. The title helps learners quickly understand what your course is about, while the description provides a snapshot of what they can expect to learn.
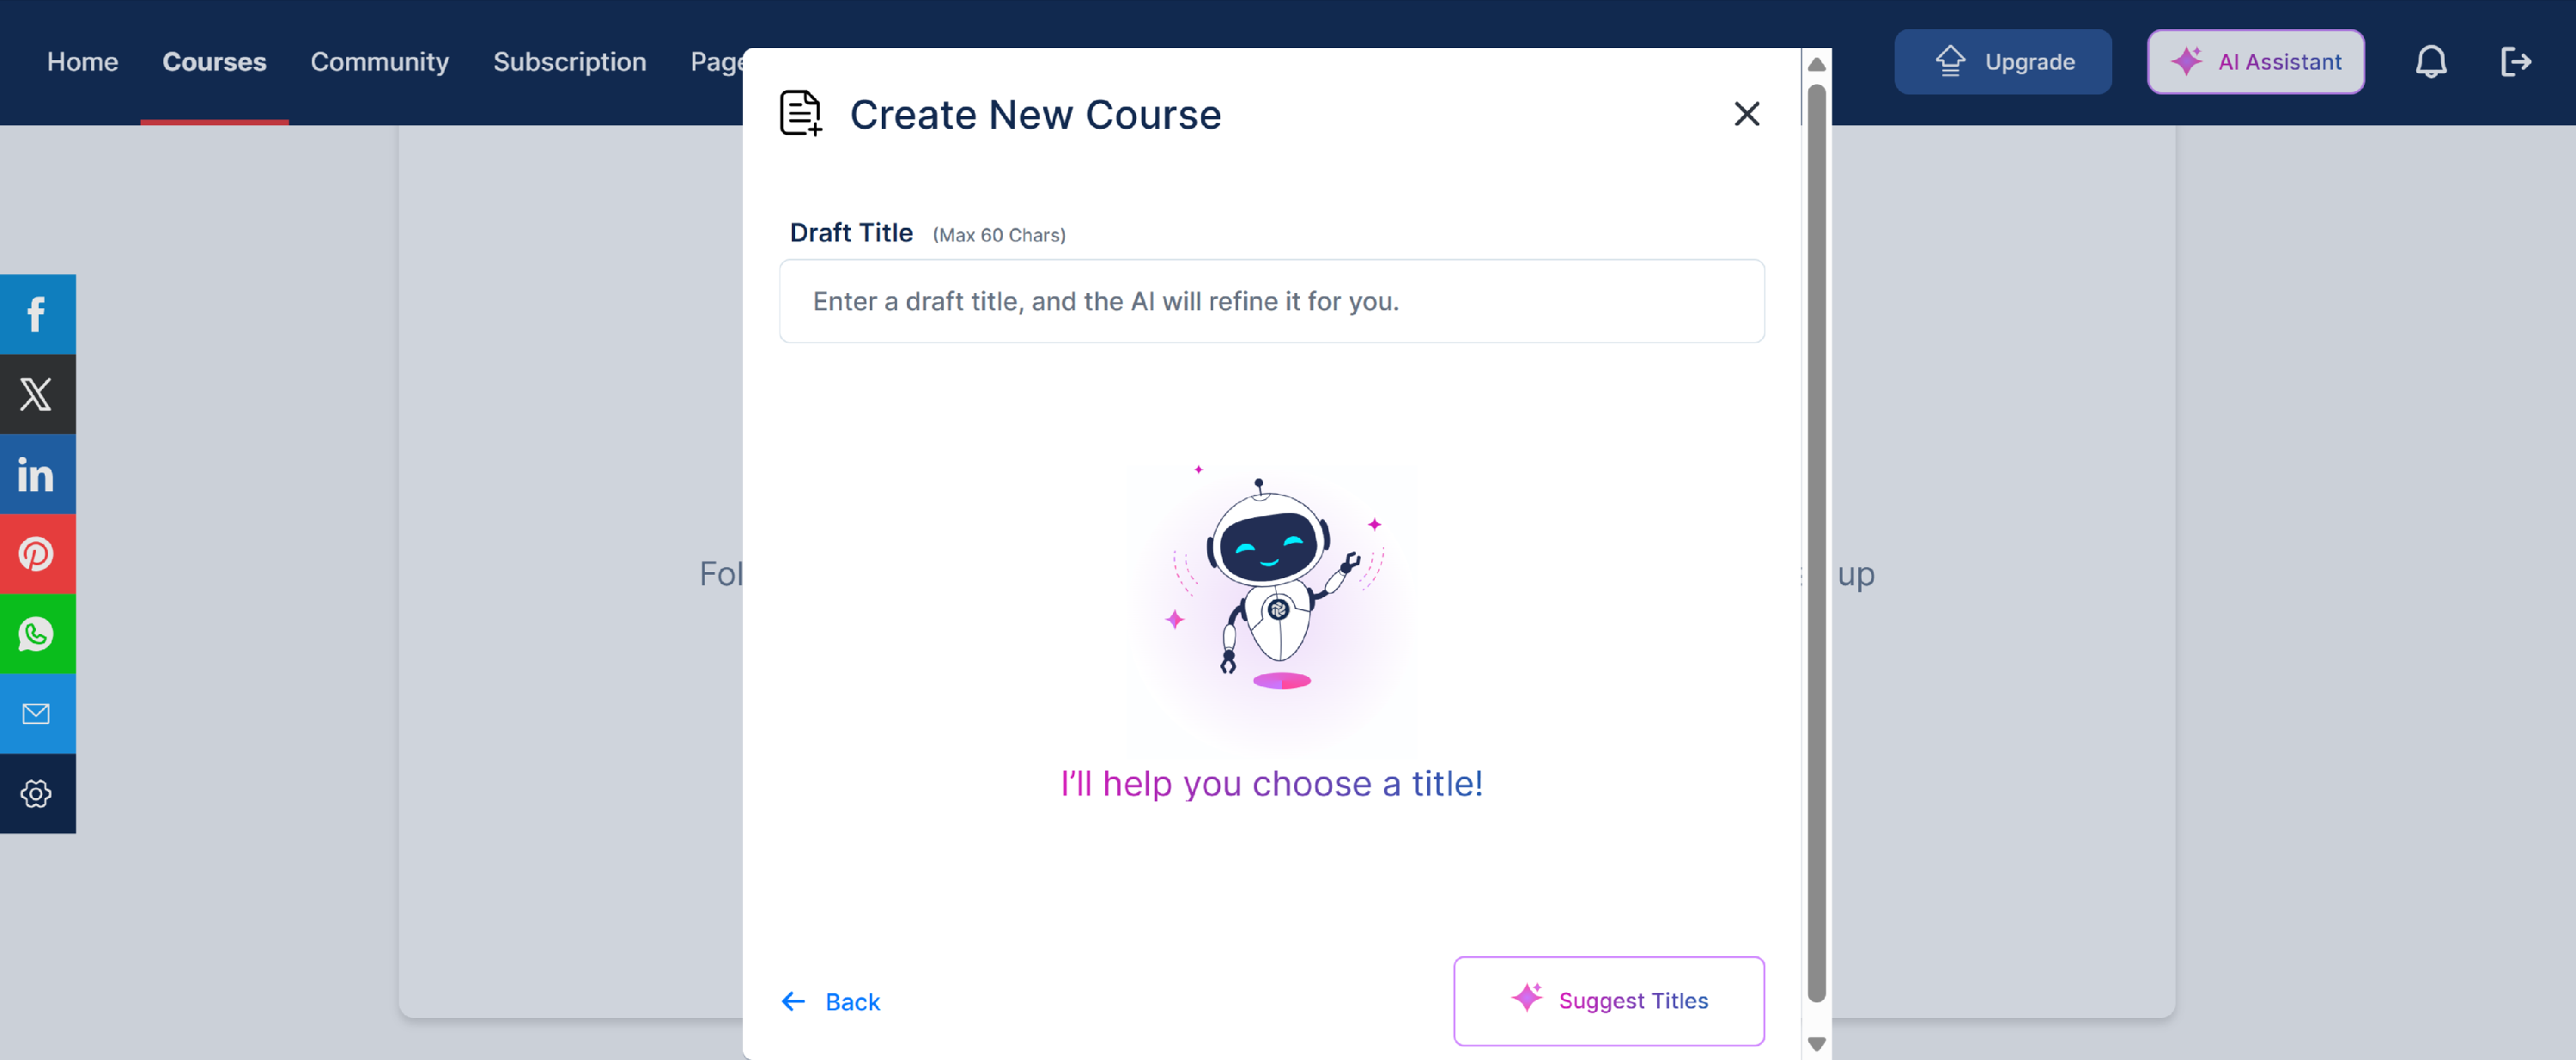
Note: You can also take advantage of the AI to suggest the best title for your course. You just need to add the title, click on the Suggest Titles button, and the AI will refine the title for you. Then, you can select your desired title.
Once the title and description are finalized, click on the Create Course button.
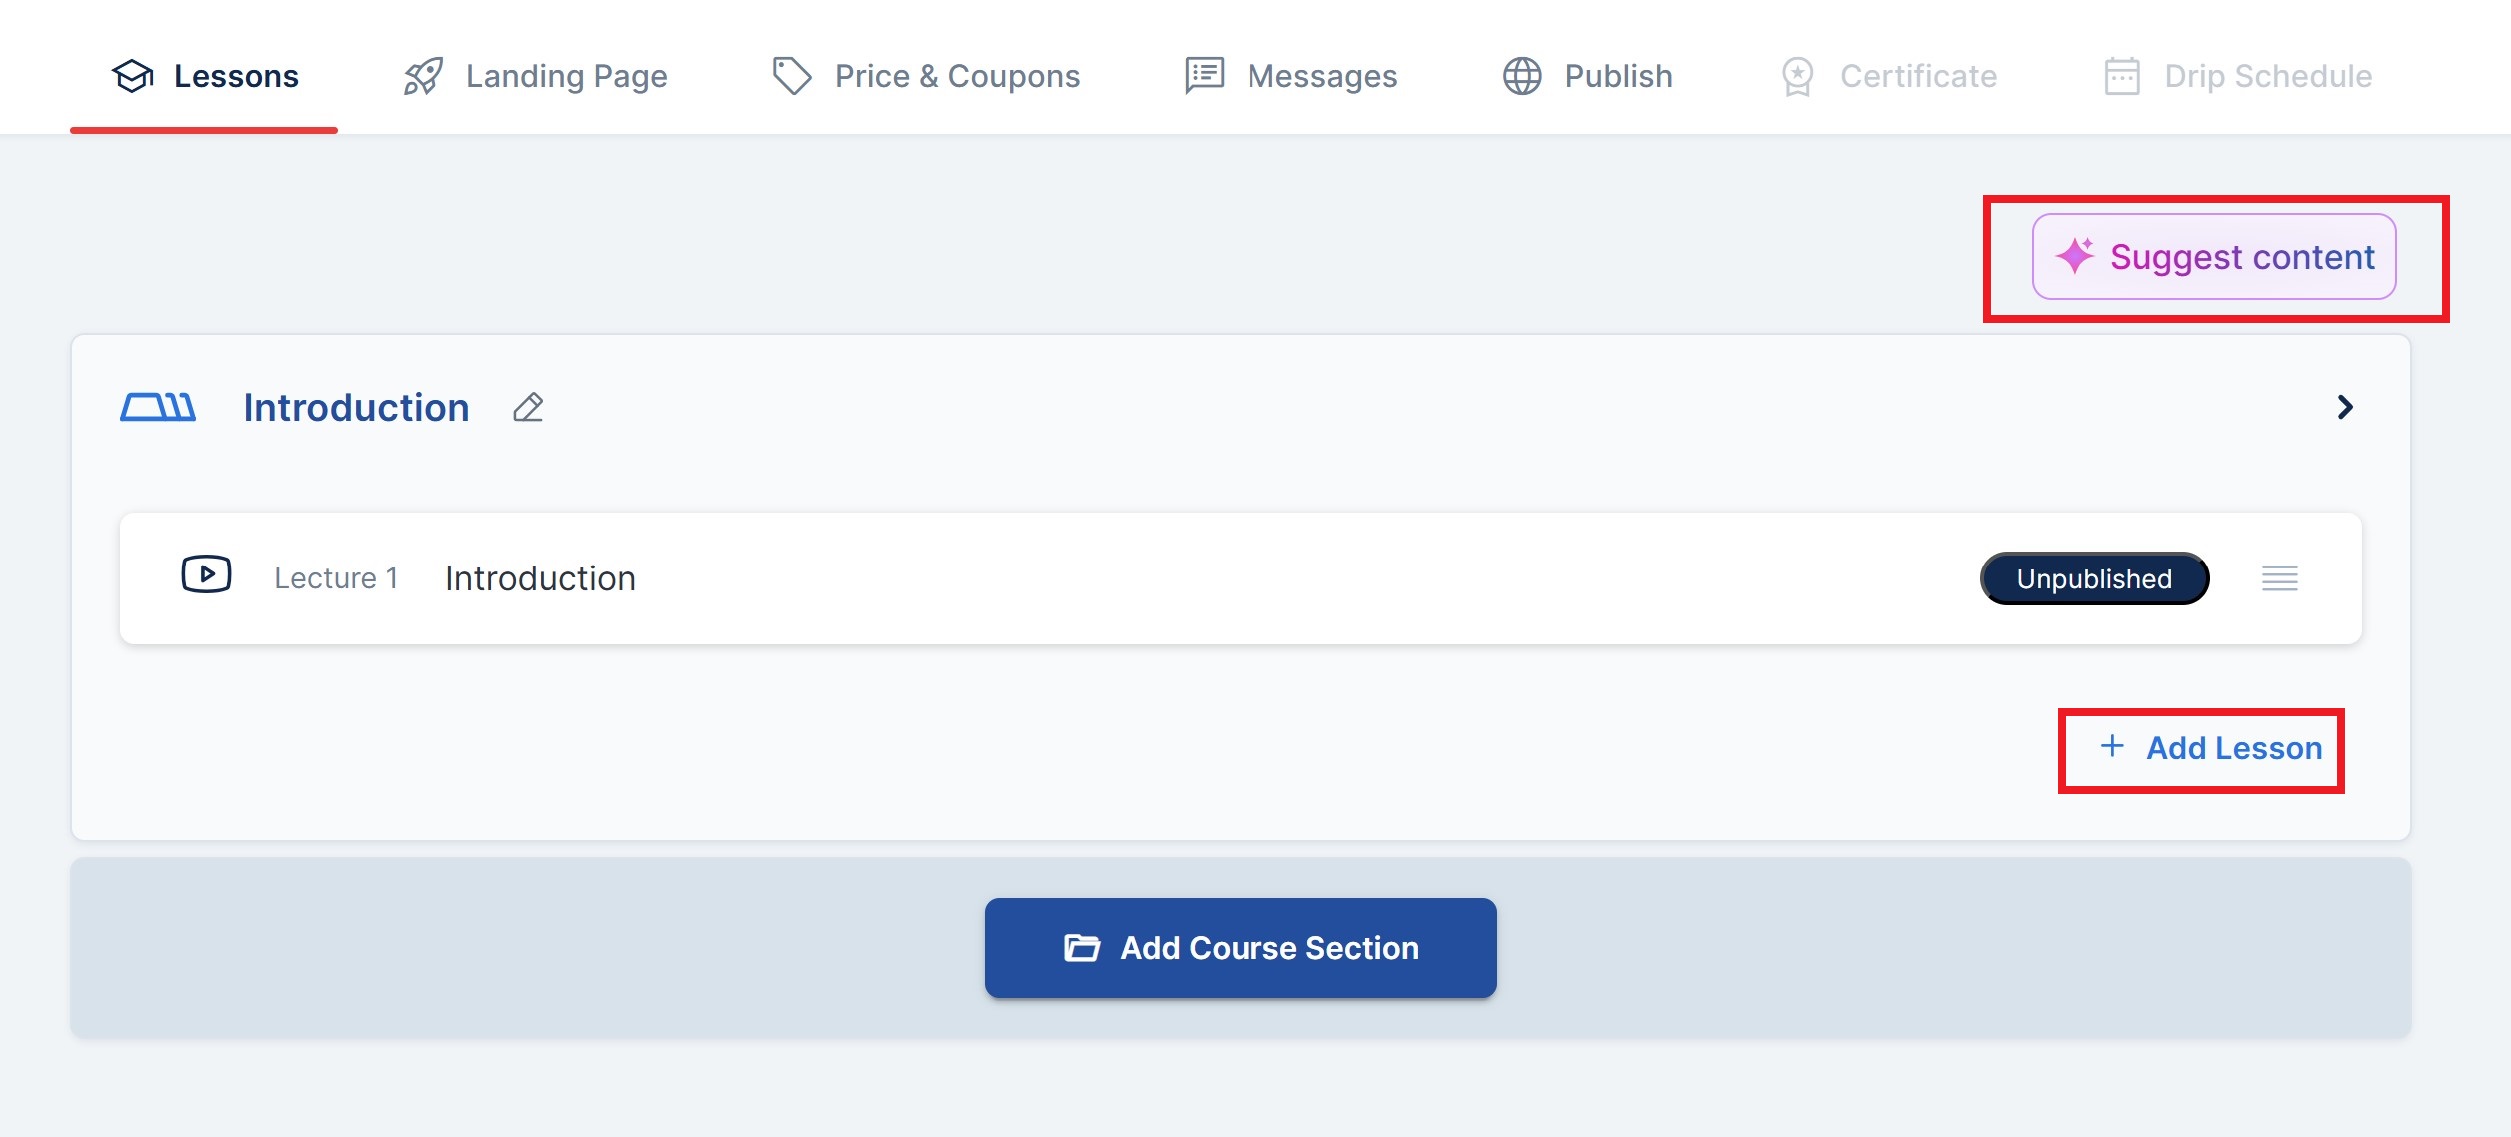
Under Lessons, an introductory course section and lesson will be provided to help you get started. You can either edit or delete the introduction as needed.
Note: You can also use the AI to suggest content for your course, or simply click on the Add Lesson button to add your lesson.
Step 2: Choose your Lesson and Video type
Click the Add Lesson button, enter a lesson title, and select the Video Lesson option. Choose your preferred video platform, then click Create Lesson to proceed.
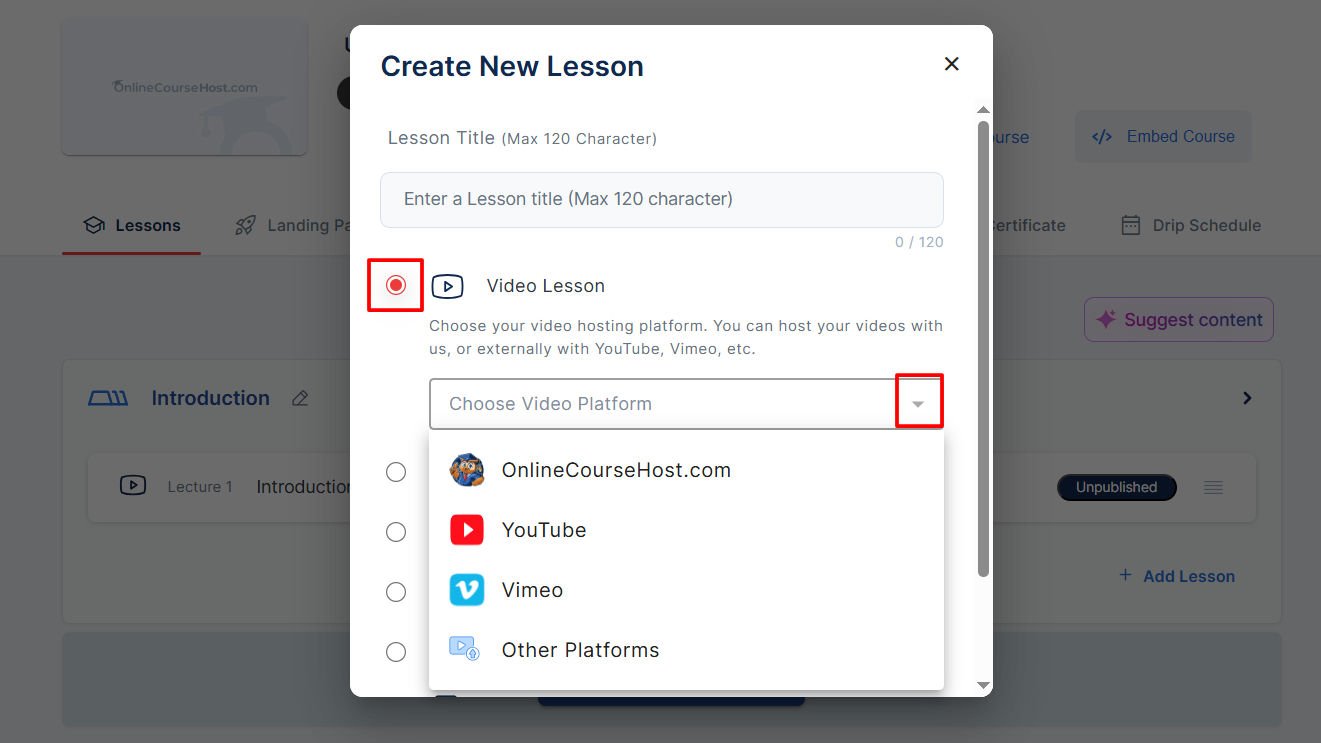
=> OnlineCourseHost.com indicates that you want to upload the video directly in MP4 format.
=> YouTube allows you to embed a video using a YouTube link.
=> Vimeo allows you to embed a video using a Vimeo link.
=> Other Platforms is for embedding videos hosted on other external platforms, such as Loom, Bunny, etc.
Step 3: Uploading Your Video Directly
Click the Add Content button and upload your video file.
- Please ensure the following before uploading:
- Your video is in MP4 format.
- The file size is less than 2 GB.
- The video length is under 20 minutes.

We highly recommend splitting your course into shorter video segments. This not only helps with smoother uploads and faster processing but also improves the learning experience by keeping content digestible for students.
Afterward, you can go ahead to generate a Thumbnail for your video, either with the AI Image Generator or by uploading another image. Then, scroll down to click Save.

Step 4: Steps to upload a YouTube video
To upload a video from YouTube, you can click the Video Lesson => insert your YouTube URL => and click Apply Video. Once you have configured the lesson according to your needs, like renaming the title, adding the description, etc., simply click on the Save button to save the lesson.
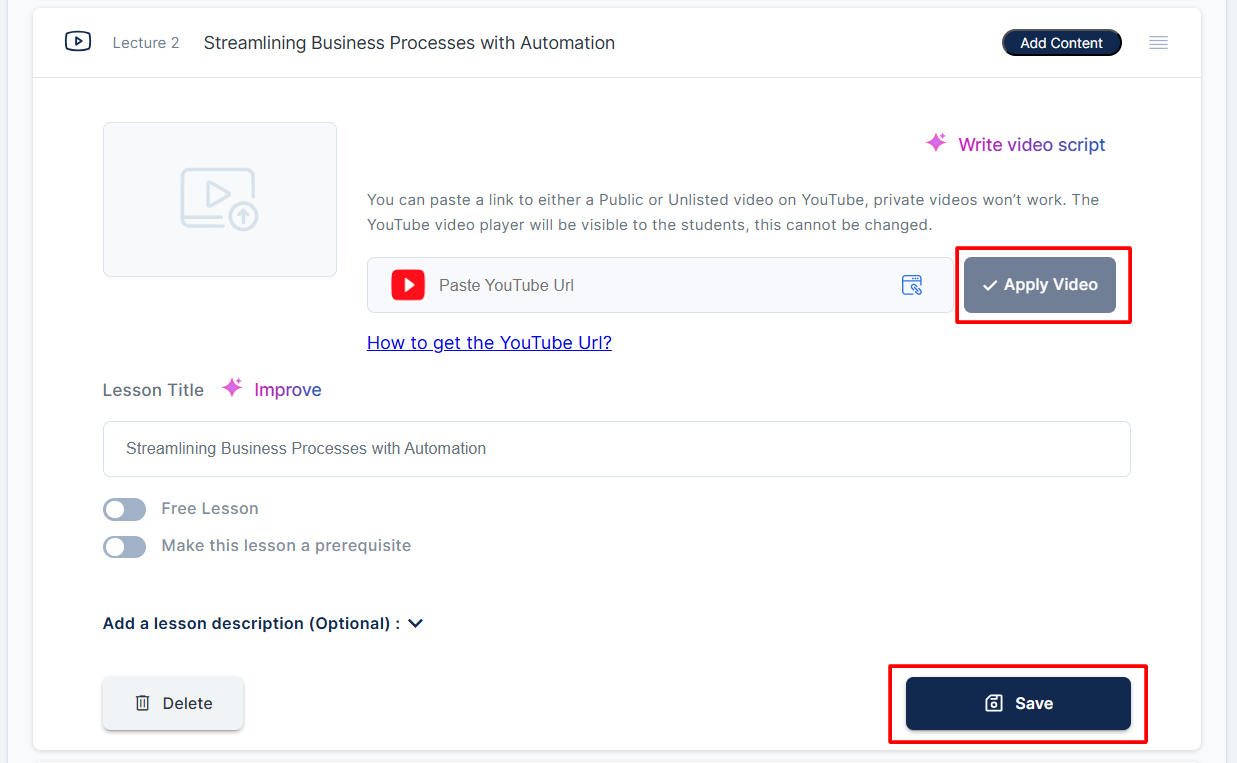
By default, the application will fetch the thumbnail of the video from the URL and show it, while saving the URL to the database. Kindly refer to this link for more information about how to generate YouTube links.
Step 5: Steps to upload a Vimeo video
To upload a video from Vimeo, you can click the Video Lesson => insert your Vimeo URL => and click Apply Video. Once you have configured the lesson according to your needs, like renaming the title, adding the description, etc., simply click on the Save button to save the lesson.
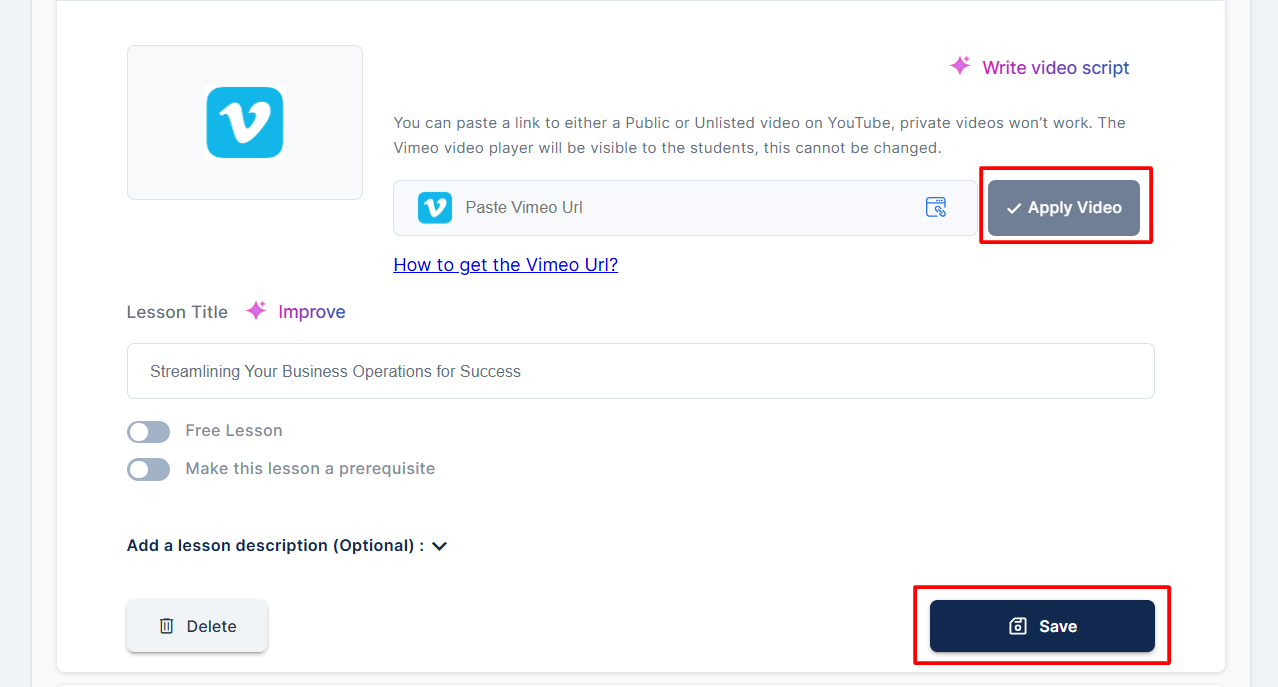
Please note that not all Vimeo links can be inserted into the lessons. Kindly refer to this link for more information about how to generate acceptable Vimeo links.
Step 6: Steps to upload Other Platforms' videos
To upload videos from other platforms, you’ll need to embed the video using an embed code. After copying the code from your external video platform’s dashboard, go to your OnlineCourseHost.com platform => edit the course in question => click the Lesson => paste the embed code => and click Apply Video. Afterward, scroll down to click Save.
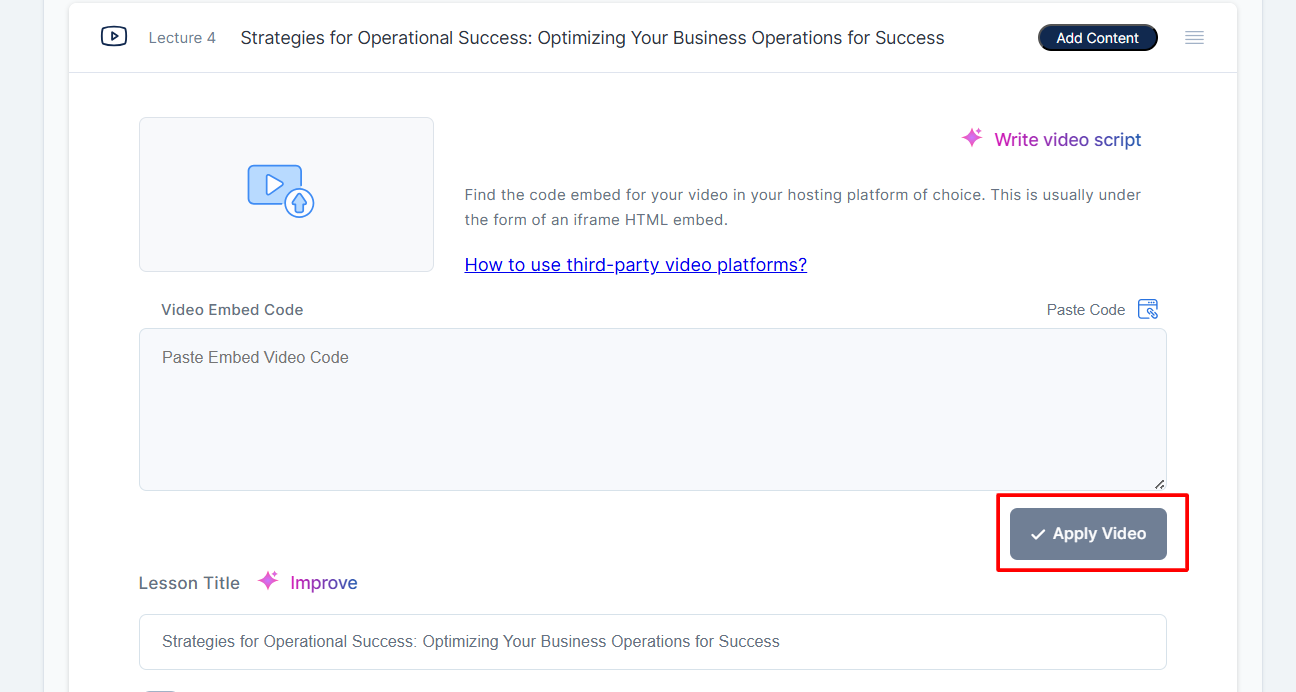
Thumbnails are not fetched for videos from other platforms, as the box accepts videos from any platform. Kindly refer to this link for more information about how to use third-party video platforms.
Step 7: Add a caption to your directly uploaded video
You can add a VTT caption file to make your video more accessible. This would act as a subtitle for your video. You can also allow our AI Assistant to write you a script by clicking the Write Video Script button.
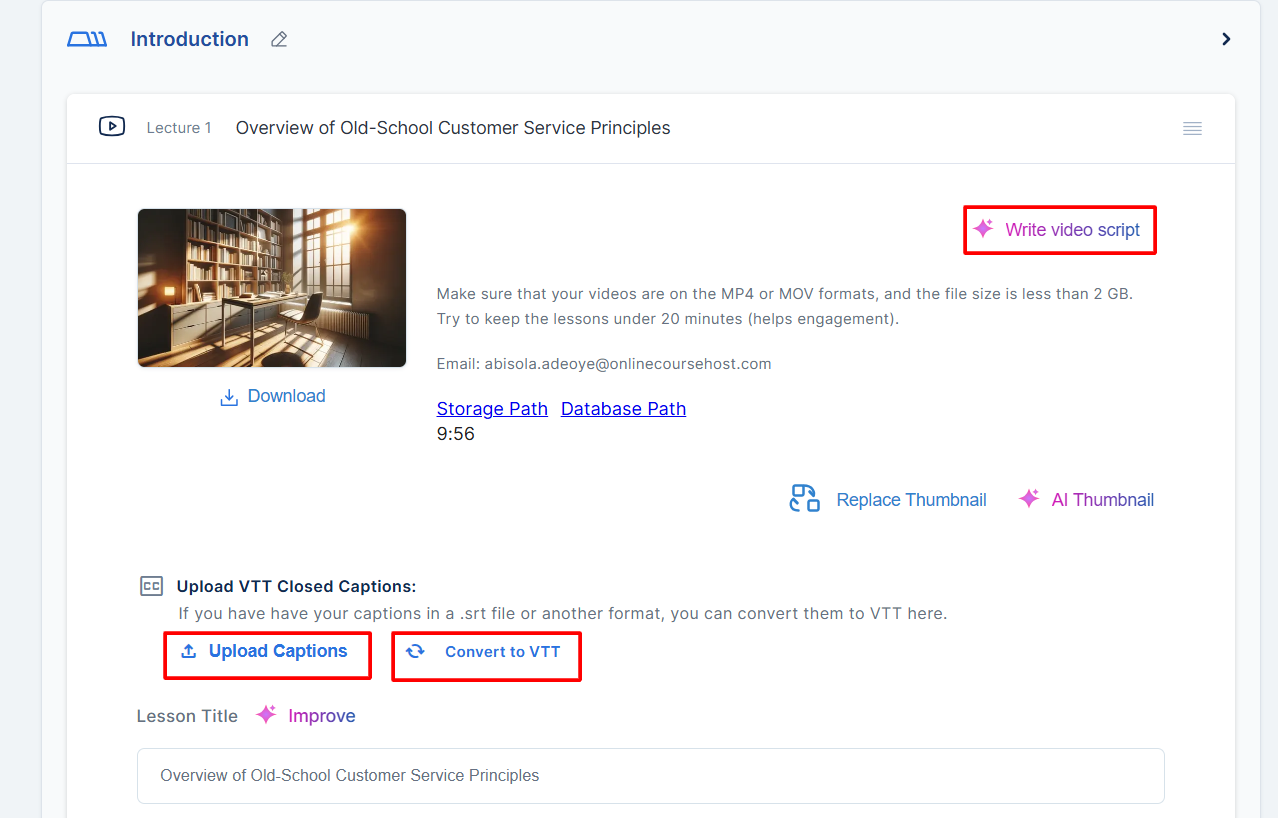
Kindly refer to this link for steps on how to add subtitles to your videos.
Step 8: Add a lesson description
Lastly, you can add a short description to further explain the videos to your students and give any additional information you want them to know.
Step 9: Publish your course
Scroll down and publish your video lesson.
Move to the Publish menu and ensure that all the requirements have been ticked. Afterward, click publish now to publish your course as a whole.
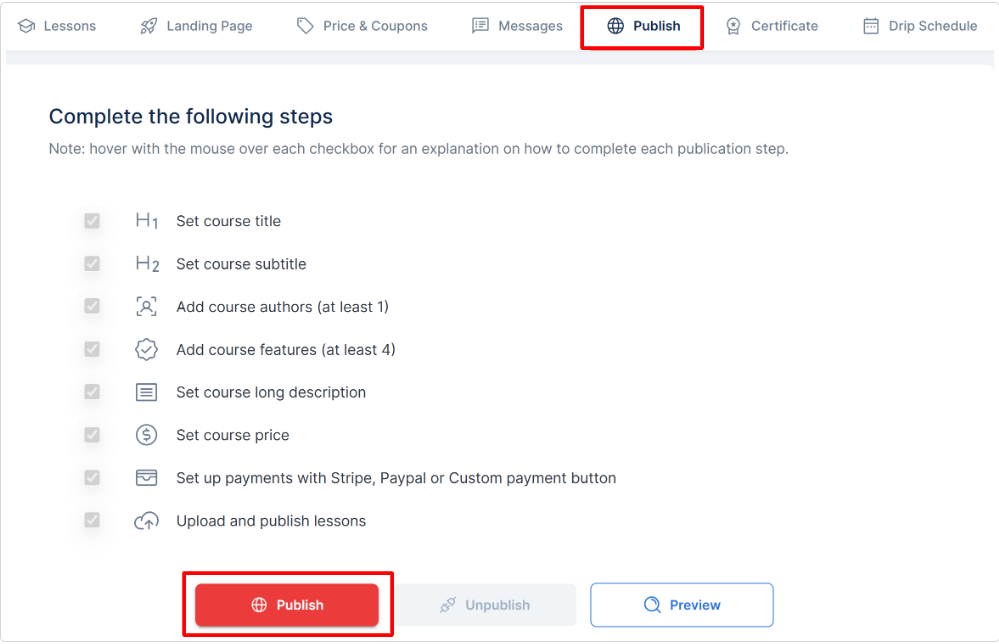
In conclusion, your course becomes available to your students after it has been published.
To view your course as a student, click Courses => View Course, and you will be taken to the course.