How to set up Course Prices and Coupons
Discounts can be a valuable tool for attracting new students and increasing enrollment. You have the option to provide discounts on your OnlineCourseHost.com courses by utilizing the Coupons feature. Coupons serve as an effective method to attract new students, reward existing ones, and increase enrollment
This article will cover the following simple steps:
- Course Pricing
- Discount Strategies
- Custom payment button
- Creating a Coupon
- Setting a deadline
- Sharing your coupon
Course Pricing
To establish the price for your course, please log in to your account, navigate to Courses => Edit => Price, and Coupons. Then, input your desired course price and click Save Changes.
Set Your Base Price
This is the standard cost of your course before any discounts or promotions are applied. It serves as the foundational price point for all other pricing strategies.
You can manually enter the standard price for your course and change the currency to non-USD options (EUR, GBP, etc.)
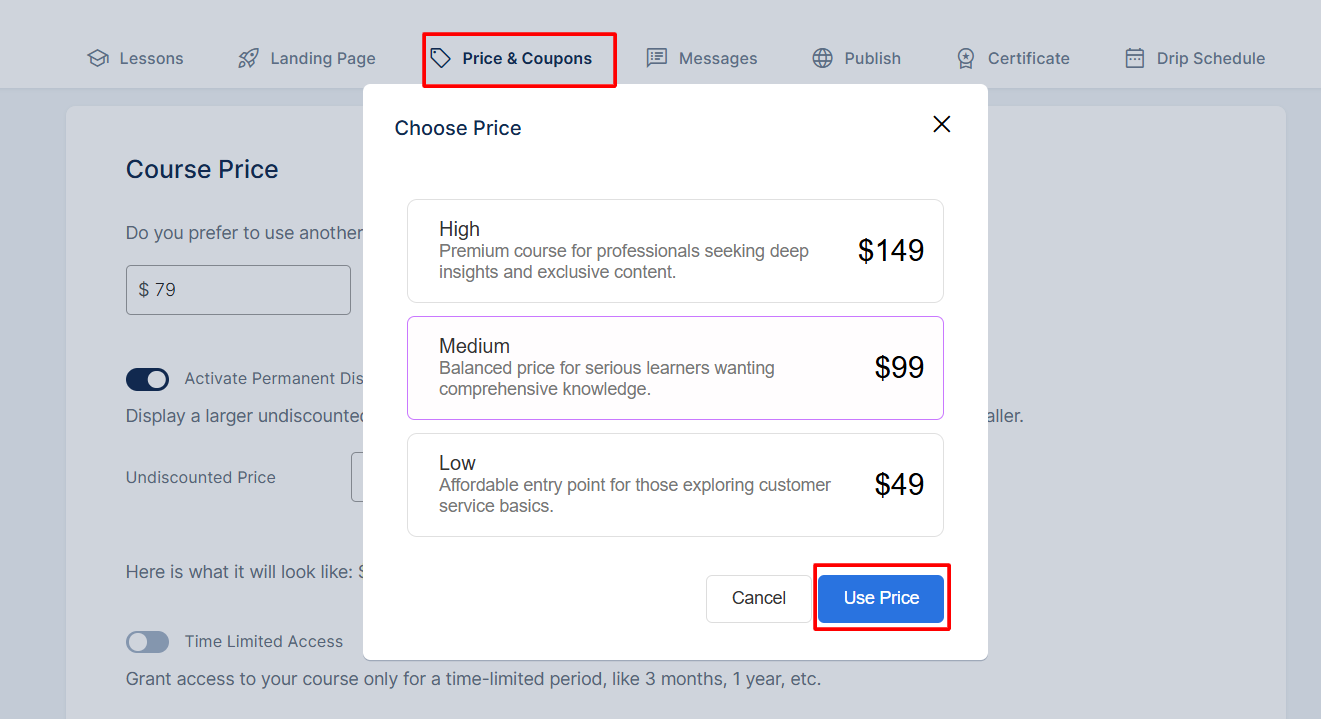
AI-Priced Suggestions
Our AI tool can assist you in determining a suitable course price. Simply click Suggest price with AI to receive data-driven recommendations. The AI offers three optional prices to choose from, taking into account the course content, course length, and current market trends in your niche.
Once you have selected the Low, Medium, or High course price, click Use Price to apply this base price to your course.
Discount Strategies
Permanent Discounts
This displays a larger undiscounted price alongside the original sales price, creating the impression of a smaller sales price. which helps create perceived value without time pressure.
To activate a permanent discount for your course, toggle the Activate Permanent Discount button to display both original and discounted prices.
It is important that the undiscounted price must be greater than the original price.
Time-Limited Access
This grants course access for a fixed duration (e.g., 1 year) instead of lifetime enrollment and is best for certification programs with expiry dates, subscription-based content, or scarcity tactics.
To enable this feature, click on the Time Limited Access button and select the access duration in days, months, or years.
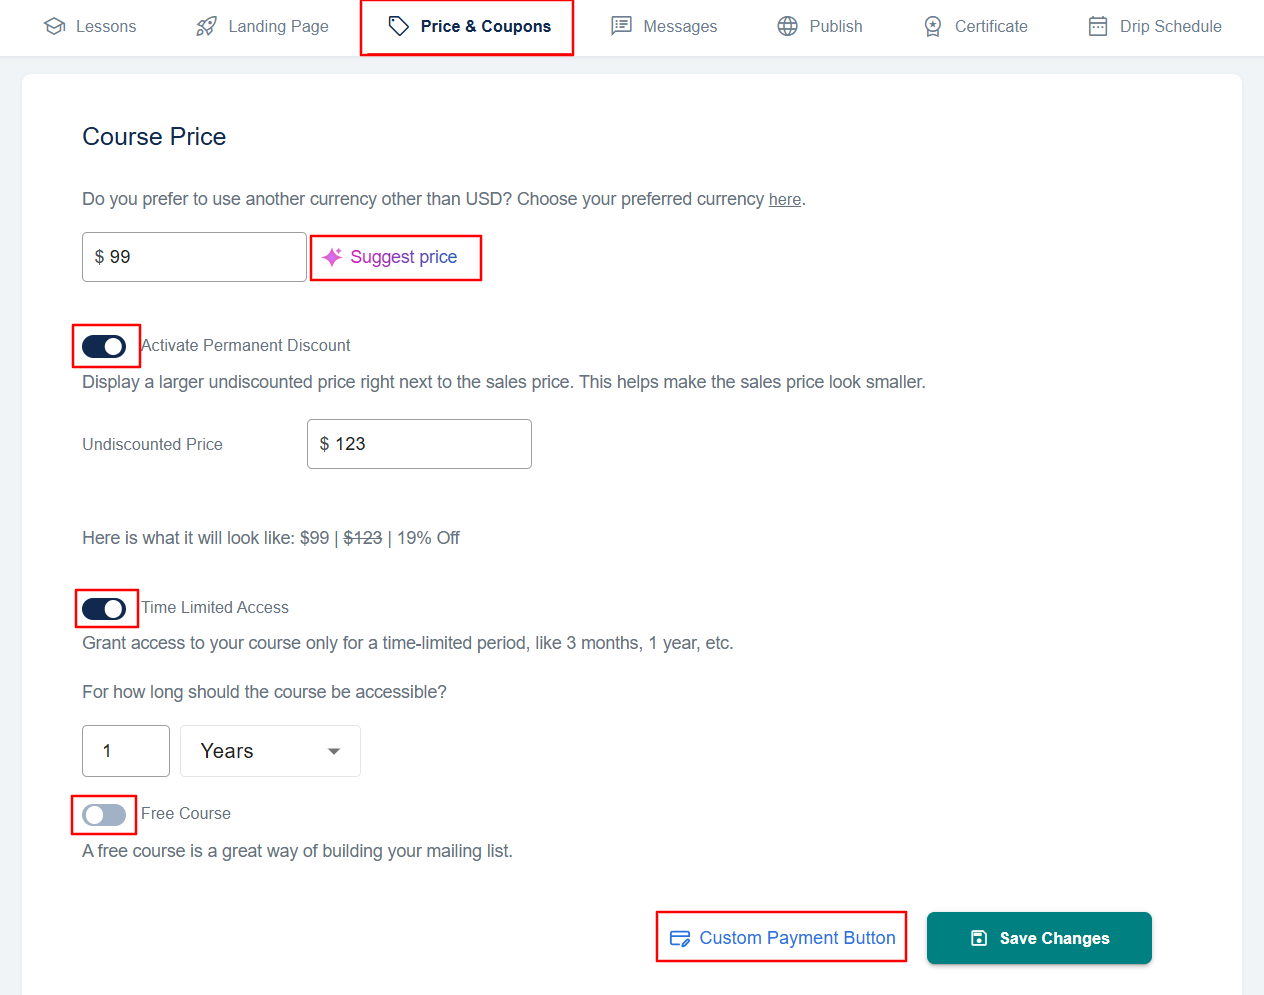
Free Courses
This offers your course content at no cost to build your email list or showcase your expertise and it is best for lead magnets, mini-courses, offering preview content, or community growth.
Pro Tips
=> You can combine different discount strategies to drive course sales (e.g., free intro course → discounted full access).
=> Always click Save Changes after adjustments.
If you prefer to use a custom payment link for your course, please refer to our Help Doc on How to Set Up a Custom Payment Button.
Creating a Coupon
To create a course coupon for your course, navigate to the Paid & Free Course Coupons tab under the Price and Coupons screen => click Add Coupon at the bottom of the screen. A pop-up window will appear where you can configure the following:
=> Coupon Title: Enter a name for your coupon (must be in ALL CAPS and can only contain letters, numbers, dashes - , or underscores _ ).
=> Free Coupon: Toggle the slider if you want the coupon to grant free access. Leave it unticked if the coupon provides a discount.
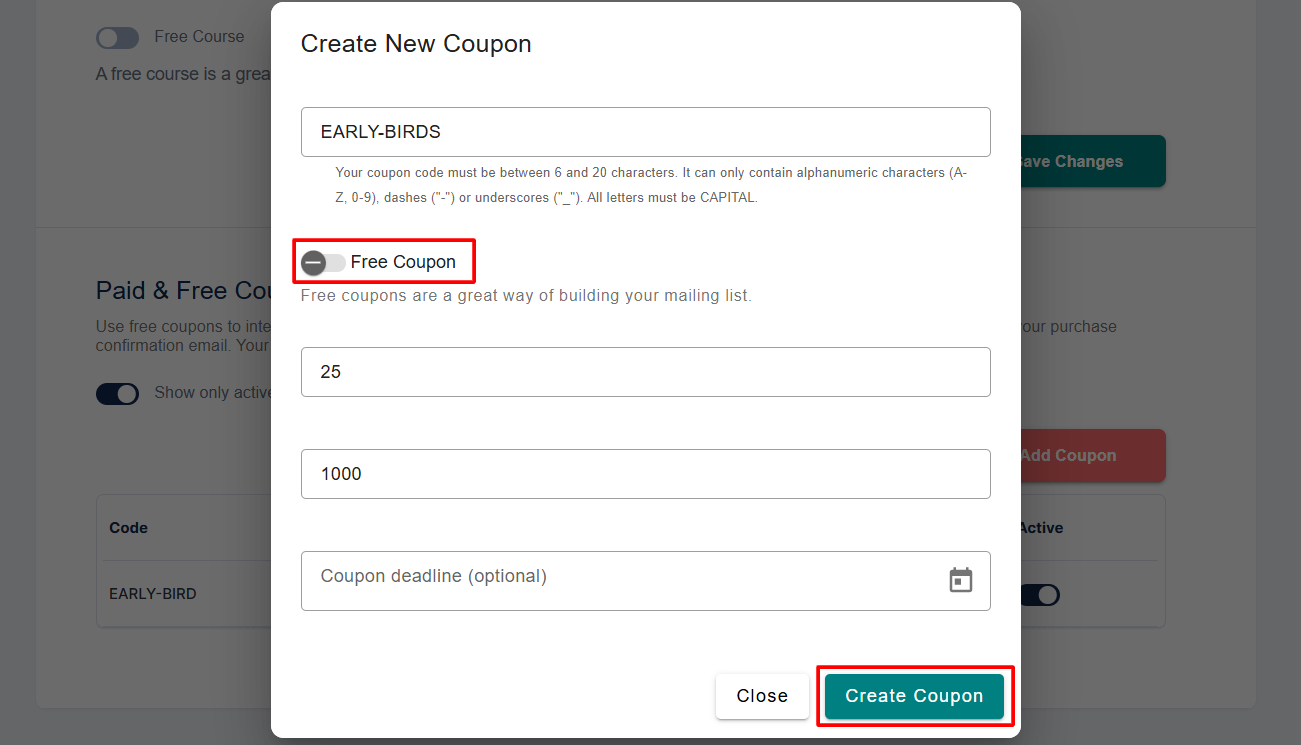
=> Discounted Price: Enter the price students will pay after applying the coupon.
=> Number of Coupons: Set how many times this coupon can be used.
=> Set a Deadline (Optional): Click the Coupon Deadline field and select an expiration date from the pop-up calendar. If no deadline is set, the coupon will remain valid indefinitely.
Afterward, click Create Coupon
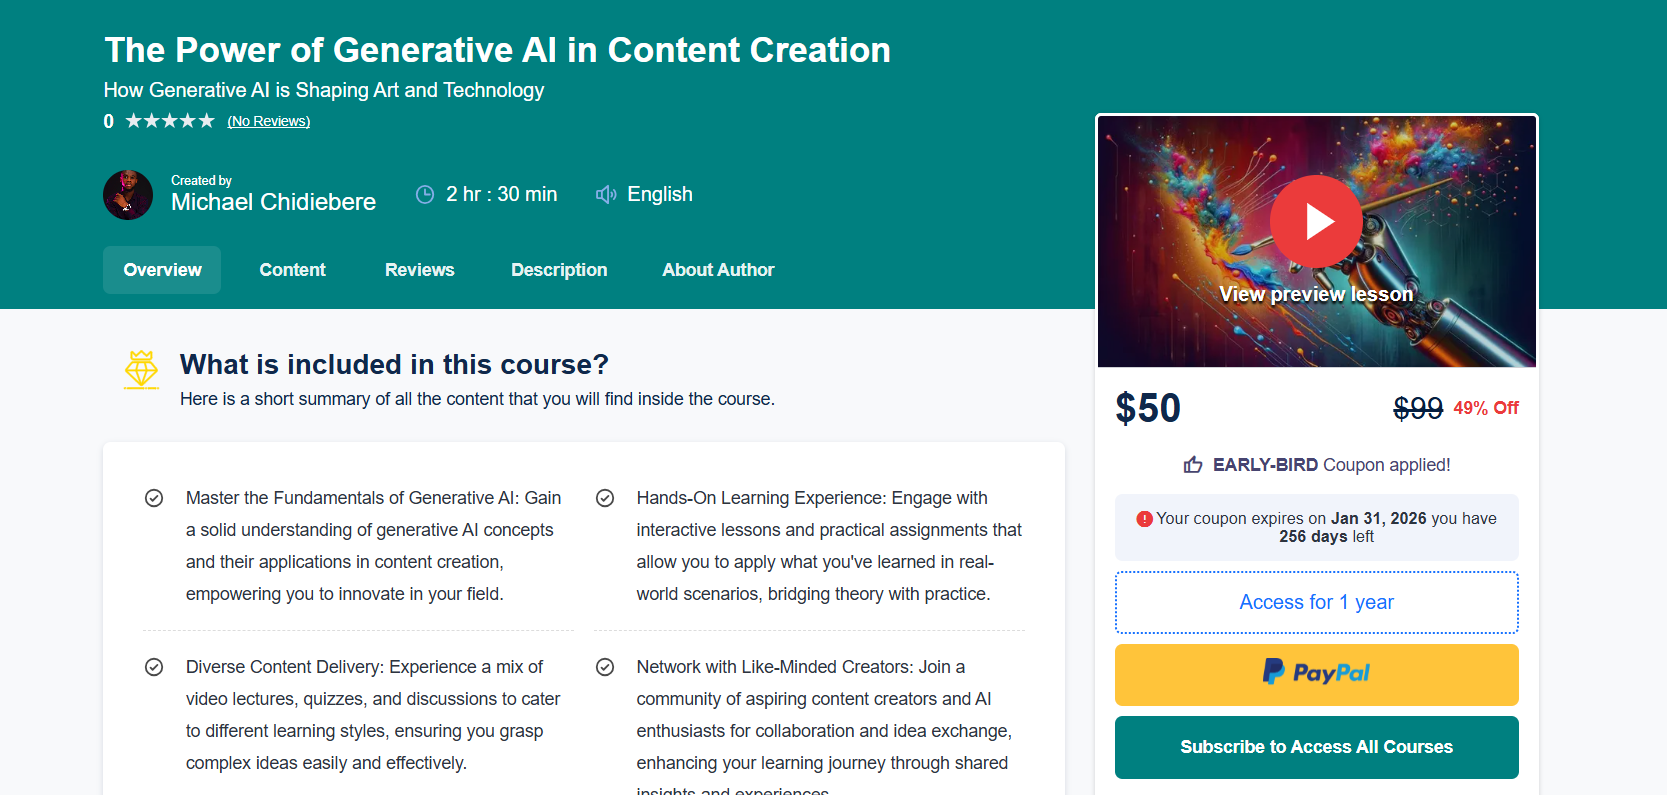
✅ Success! Your coupon is now active and applied to the course. The coupon link or code can be shared with students to apply the discount during course purchase.
Sharing Your Coupon
You can share coupons in two ways:
Option 1: Manual Code Entry
Students can manually enter the coupon code on your course sales page and click Apply.
Option 2: Direct Coupon Link
Go to Edit Course → Price & Coupons → Paid & Free Course Coupons. Click Get Link next to your coupon. Copy and share this link, when clicked, the coupon will auto-apply to the course.

If you wish to view only the coupons that are currently active, you can toggle the show only active coupons button.
Notes
- Here, you can find all the details of your coupon: the Coupon code, the Link, the Price, the number of remaining coupons, and the coupon deadline.
- You can also activate or deactivate your coupon at any time by using the Active slider button.
- You can edit and delete your coupon at any time using the edit and delete buttons.
- It is not recommended to use a coupon to invite a large number of users; it is advisable to directly invite users to a group via the Manage Students screen instead.