How to preview and publish your course
After creating a course, the next step would be to publish it. Before sharing your course with students, preview it to ensure everything looks perfect! Here's how:
Preview your course
Log in to your account => go to Courses => Select your course => Click Edit => navigate to the Publish tab => scroll down the page and click Preview.
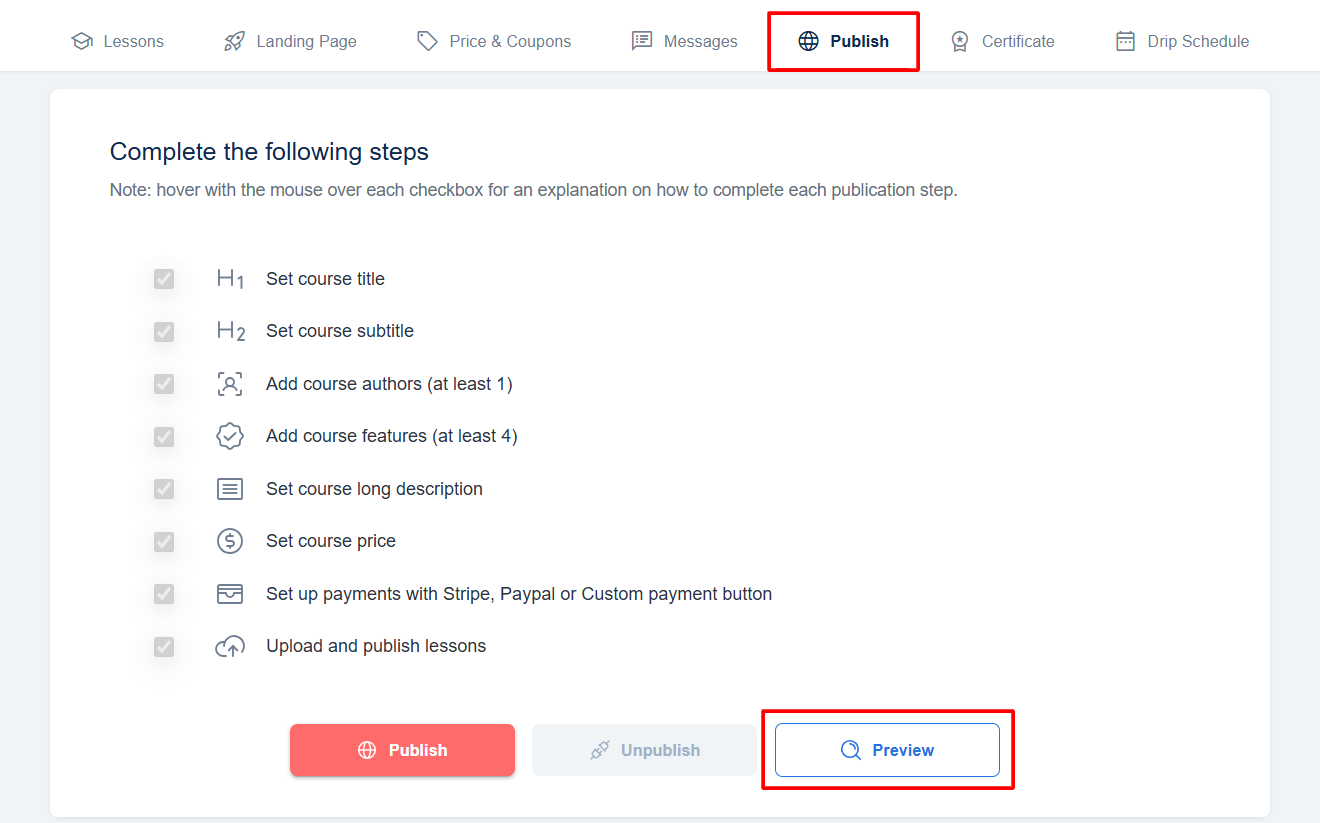
Clicking the Preview button will redirect you to the course landing page as a student, allowing you to experience the course as a student would. Subsequently, you can proceed to publish your course.
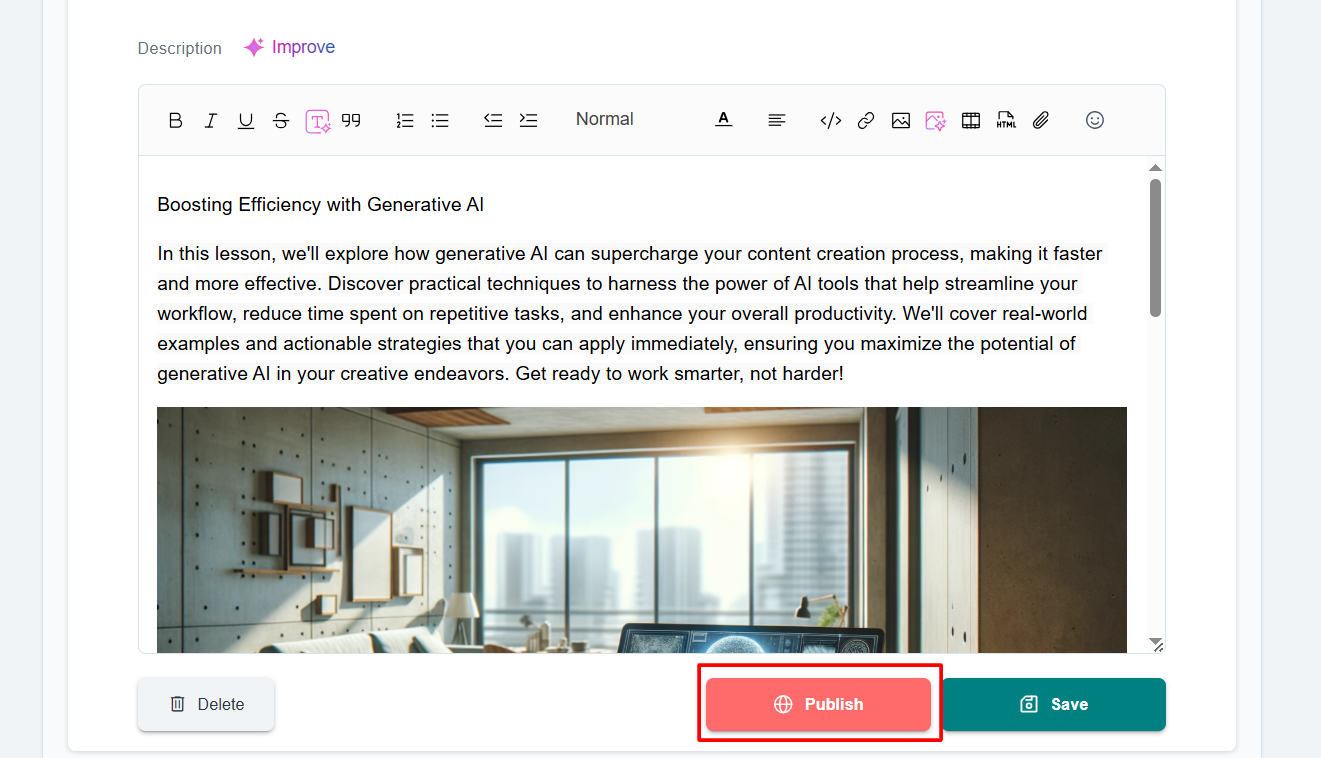
Publish individual lessons
To publish a course that you have created, you first need to publish each individual lesson. First, log in to your account navigate to the Courses section, and select the course you wish to edit. Once in the course, access the Lessons tab, scroll down to each of your lectures, and proceed to publish them all.
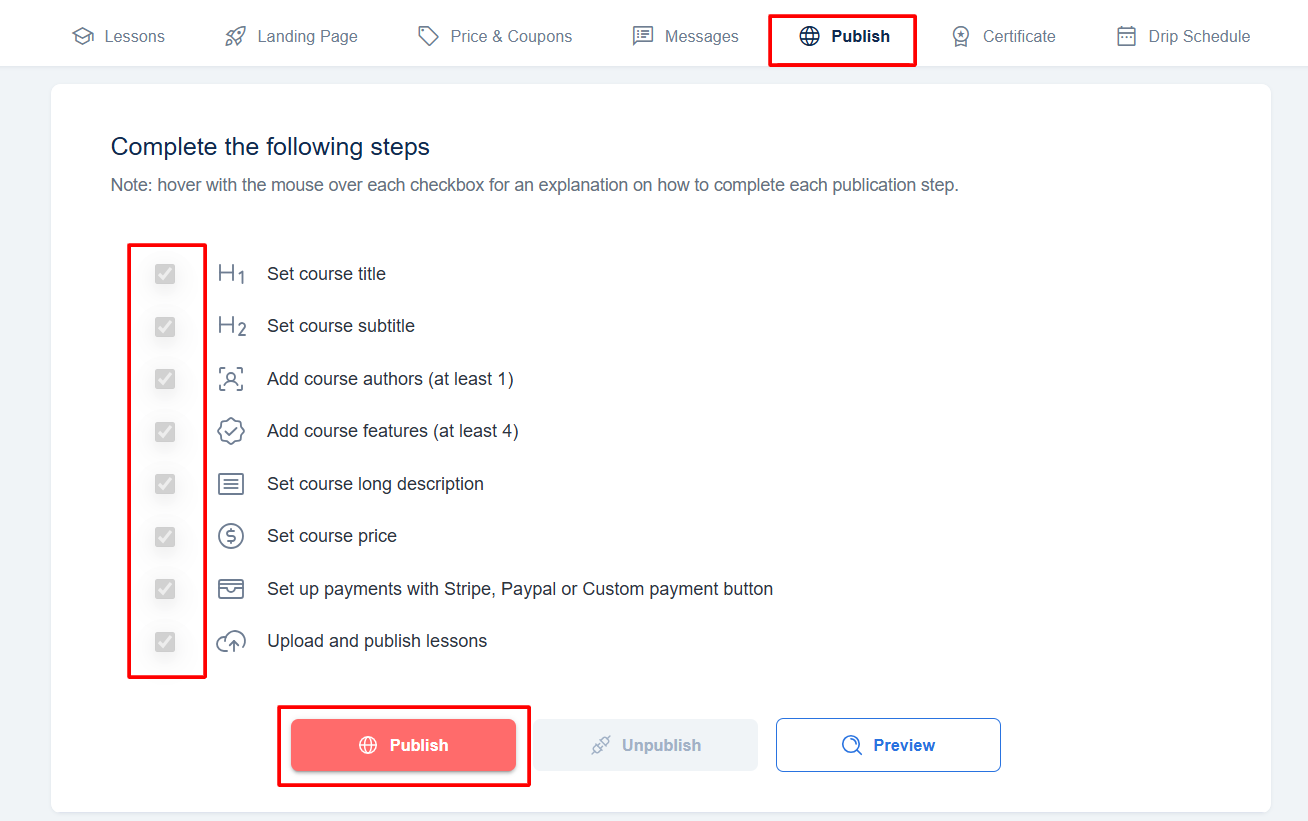
Finalize course publishing
After publishing each lesson, go to the Publish tab and ensure that all the requirements have been checked ✅. Then, click Publish.
Set your course URL
After clicking Publish, a pop-up window will appear. Here you will need to set your course path.
Note that you can use only lowercase letters, numbers, and hyphens (-) when creating your course path; no spaces or special characters are allowed. (e.g., the-power-of-generative-ai). The AI Assistant would also automatically generate a course path that you can use.
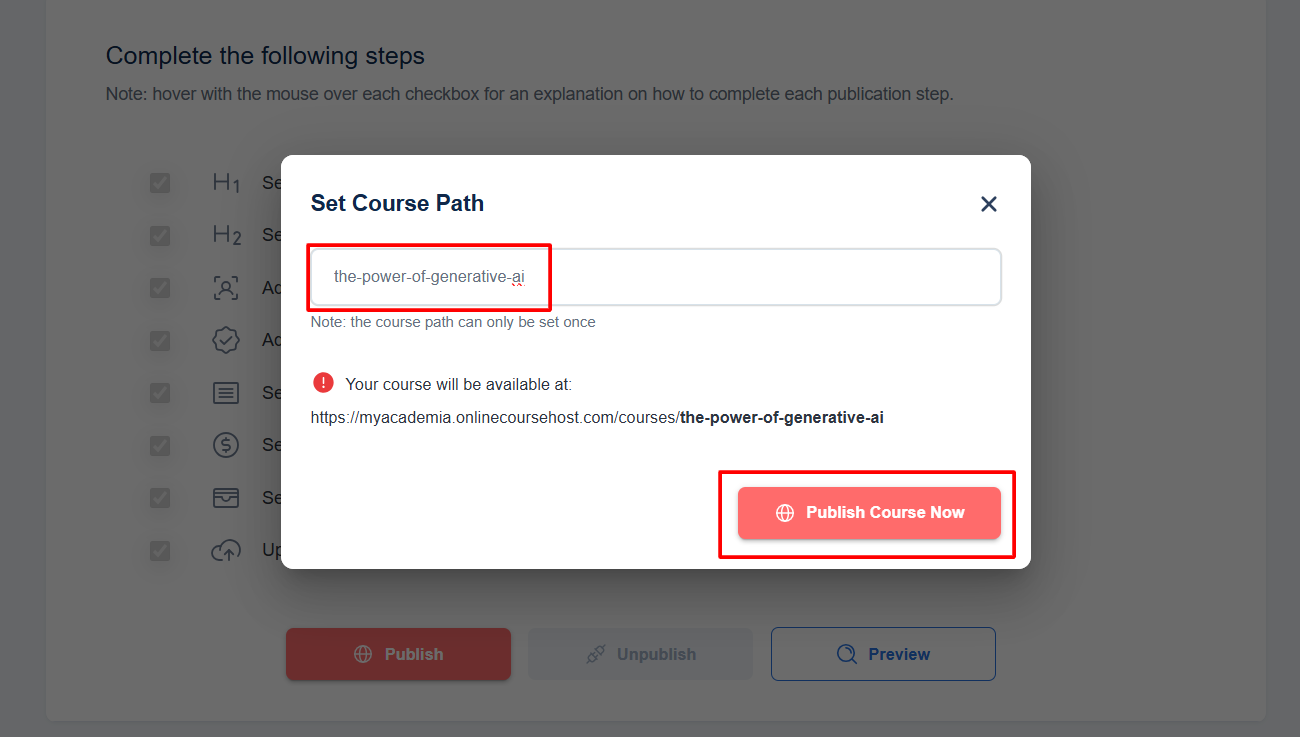
If you need to change your course path, you can unpublish the course, and publish it again, to set a new URL.
Congratulations, your course is now live!
Additional Resources
- Kindly refer to this link for the checklists required to successfully publish your course (All requirements explained).
- You can also refer to this helpful document on how to design your course sales page (to understand the requirements listed under the publishing tab and optimize for conversions).
- Additionally, please refer to our help documentation on Toxicity Content guidelines (Avoid common publishing issues).