How to Optimize Your Course Sales Page on OnlineCourseHost.com
Your course sales page (landing page) is a powerful marketing tool designed to convert visitors into paying students. It showcases your course’s value through compelling content, strategic calls-to-action (CTAs), and promotional offers like discounts.
To access and edit your landing page: Courses → Edit Course → Landing Page
In this article, we will go over the following:
- Choose Course Image
- Course Details
- Course Authors
- Course Features (What is included in this course?)
- Long Description
- Frequently Asked Questions
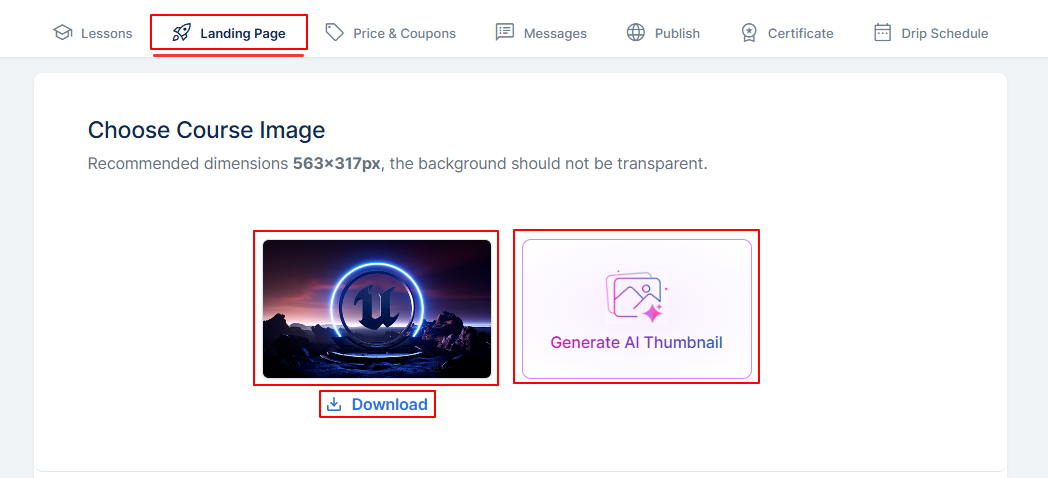
Choose Course Image
Course images give users a snapshot of your course content and can make a great first impression.
To choose your course image, click the pencil icon on the image tile and proceed to upload a high-quality image from your device or utilize our AI image generator to create a professional thumbnail. You can click on the Download button to download your course thumbnail.
The recommended dimensions are 563x317px, but the background should not be transparent.
Course Details
In this section of the course landing page, you will input the various titles of the course, including the course landing page title, course subtitle, and card description.
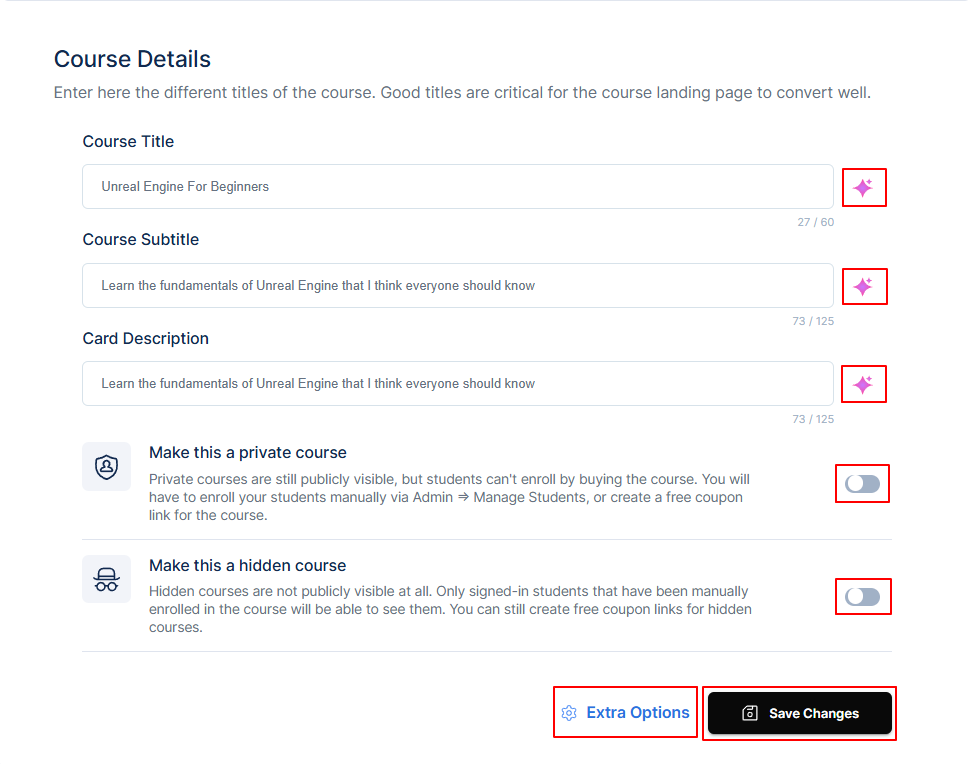
Effective course titles are essential for the course landing page to drive sales. You can use our new AI Suggestion tool to generate optimized course titles, subtitles, and card descriptions.
Kindly see our related Help Document about the OnlineCourseHost.com AI-Based Course Creation Assistant.
Course Visibility & Access Settings
Make this a private course
Activating this button will make the course a private course. Private courses are still publicly visible, but enrollment requires manual student addition (Admin → Manage Students) or a free coupon link.
Make this a hidden course
Activating this button will hide the course. Hidden courses are completely invisible to the public, accessible only to manually enrolled students who are signed in. Additionally, you can create free coupon links for hidden courses.
Click on Extra Options to access the additional landing page settings.

Hide Lifetime Access
Activating this button will conceal any references to a Lifetime offer on the course page. This allows you to offer access for a limited time, such as a year. Subsequently, you can manually revoke the student's access.
Hide Course Total Duration
Activating this button will conceal the text referring to the video duration of the course. This can be advantageous for courses that predominantly feature audio and text content.
Manage Reviews
Here you can efficiently manage your review system without accessing the Admin dashboard: Guide on setting up a review system in your course platform.
Manually Set Course Duration
The platform's system only calculates the duration of videos that are directly uploaded to the platform. However, if there are multiple external videos on platforms such as Vimeo, Loom, Bunny, YouTube, or even audio files, you can override the platform's duration and manually input your own.
To do so, select the corresponding option and input the duration in hours and minutes. Afterwards, click on Save Changes.
NOTE: Once you are done setting up your course details, click 'Save Changes.'
Exclude from Subscriptions
This allows you to exclude some courses from the subscriptions sold on the platform. This way, you can sell subscriptions and still sell some courses as standalone products.
Hide Redeem Coupon Field
This allows you the option to hide the coupon field on the course sales page. This is useful for course creators who do not have coupon codes for their courses.
Hide Live Sessions and Webinars Reminders
This allows you to hide the live session and webinar reminders that are displayed on the Products page.
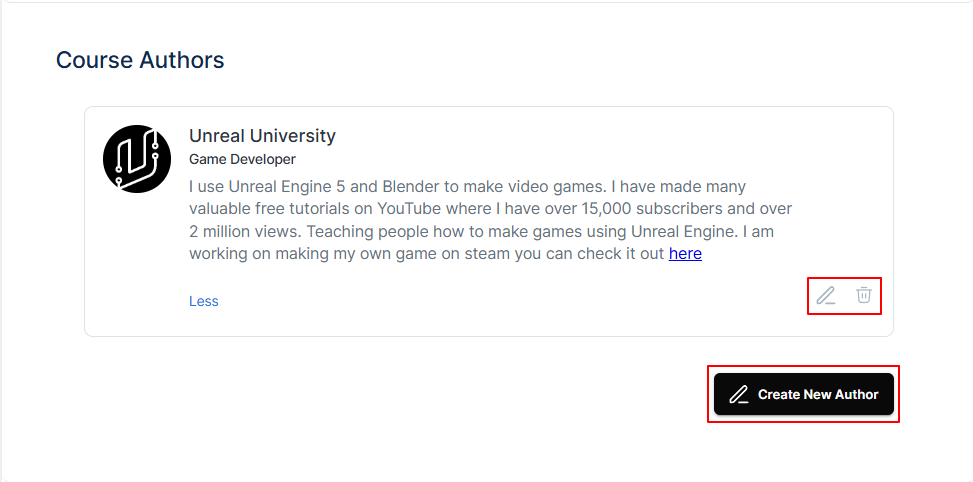
Course Authors
The course author is accountable for developing curriculum materials, including learning activities, assessments, and instructional guidelines.
You have the option to either add an existing author from a previously created source or create a new author.
Course Categories
Here you can organize your courses into categories for better navigation. Each course can belong to one or more categories.
To do this, follow these steps:
Click on Choose Categories → Manage Categories → Add New Category → then proceed to Choose a predefined color or enter the color hex code → input the Category Name and click Save Categories.
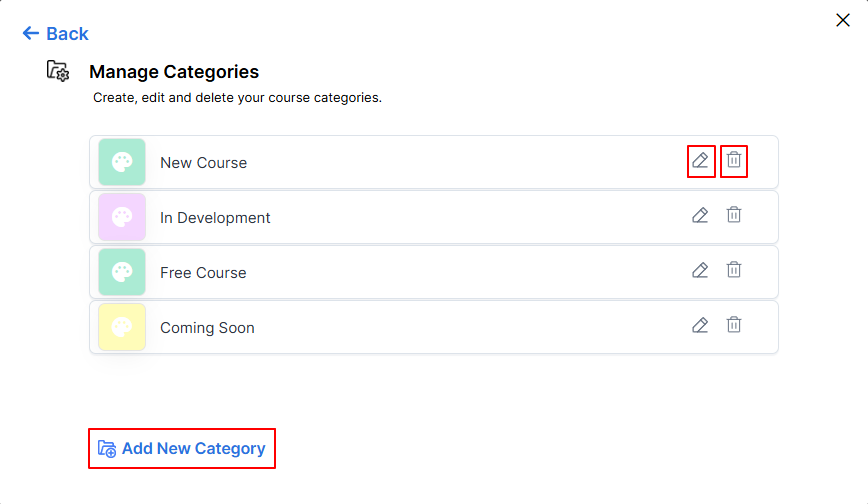
Please note that existing categories can be edited or deleted in the Manage Categories screen.
Learn more about course categories here.
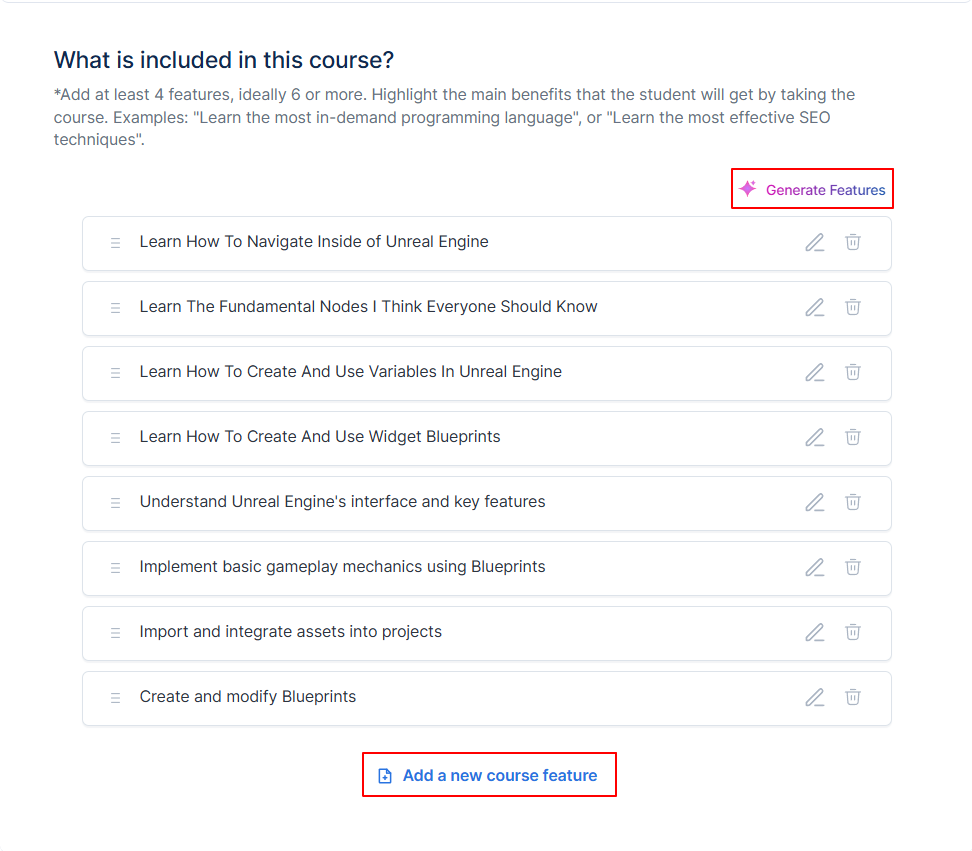
Course Features
Course features highlight the main benefits that participants will gain from the course. You need to add at least four or more course features by clicking the 'Add a new course feature' button, or take advantage of our AI suggestion tool to generate optimized feature recommendations for your course by clicking Generate Features.
Long Description
The long description of the course provides a comprehensive overview of the significant learning experiences it offers. This includes a detailed outline of the topics covered, the learning objectives, the instructional methods employed, and the resources required for successful completion of the course. Additionally, it should outline the expected outcomes of the course.
To optimize your long description, select 'Write Description' to leverage our AI-powered suggestion tool.
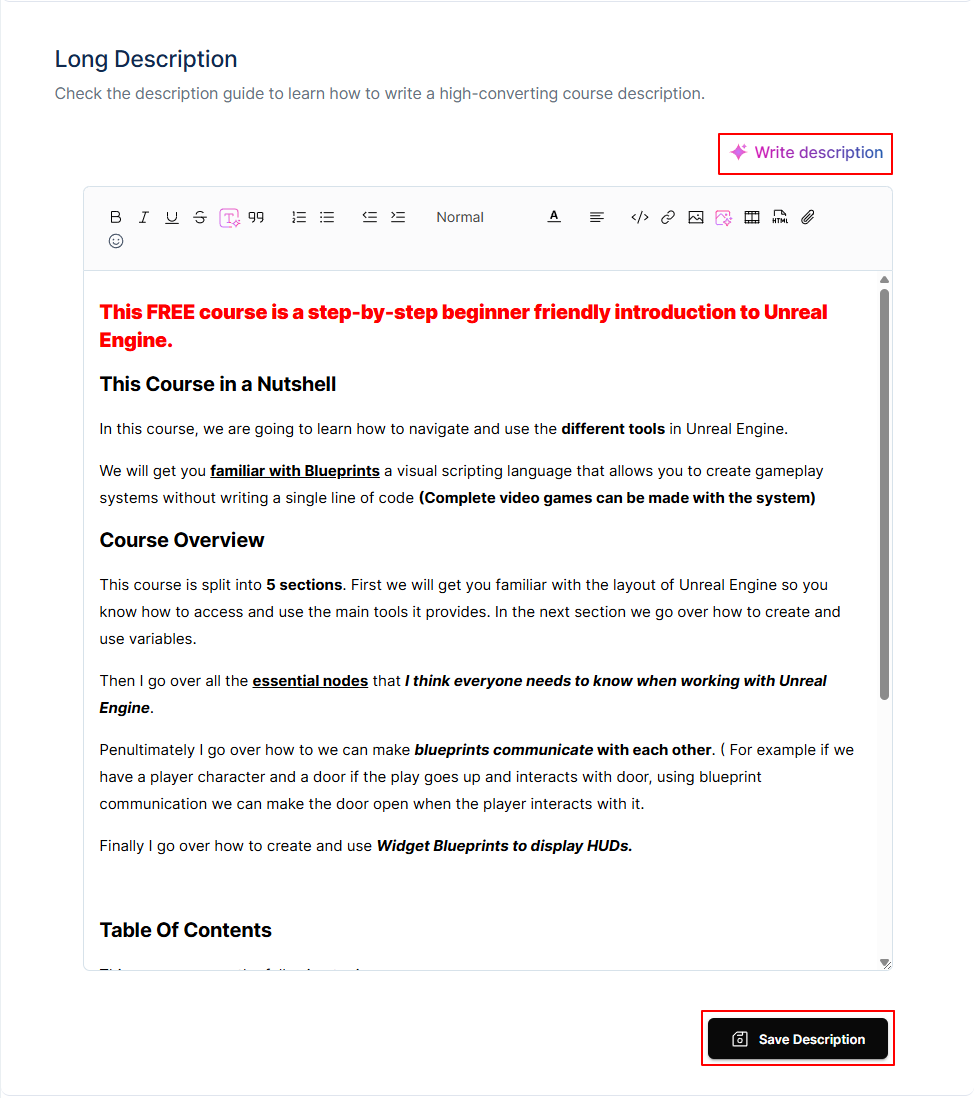
After adding your course's long description, scroll down and click the 'Save Description'.
Kindly check out our blog on: Crafting a Compelling Online Course Description for Higher Conversions.
Frequently Asked Questions
This is a list of questions that are commonly asked by your students about your course. Frequently Asked Questions (FAQs) aim to offer users convenient and prompt access to course-related details. To manually add FAQs, click 'Add New FAQ' at the bottom of the section. Enter the question in the title field and the corresponding answer in the description field, then select 'Save.' Alternatively, use the 'Generate FAQs' option to leverage our AI-powered suggestion tool.
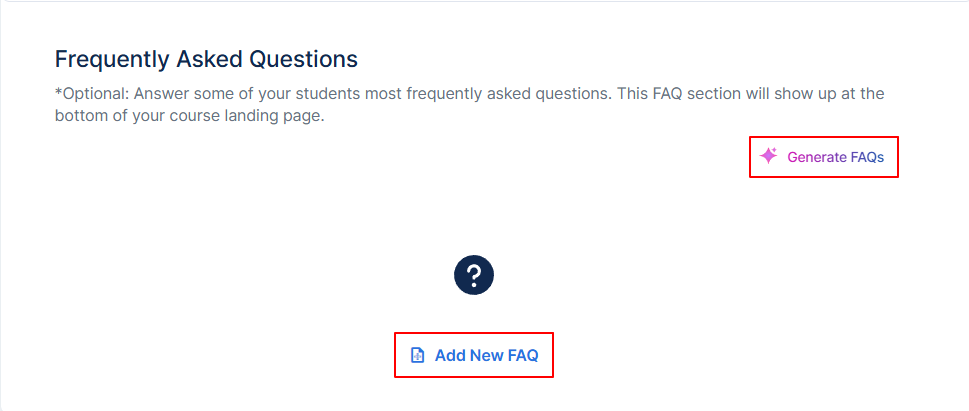
NOTE: The Frequently Asked Questions section will be displayed at the bottom of your course landing page. You can also edit, delete, and add as many FAQs as you find necessary.