How to create a rich text lesson?
A rich text lesson combines formatted text, images, and hyperlinks to create an engaging learning experience. It functions much like a blog post but is designed specifically to be part of an online course.
In this tutorial, we will guide you through the steps to create a rich text lesson.
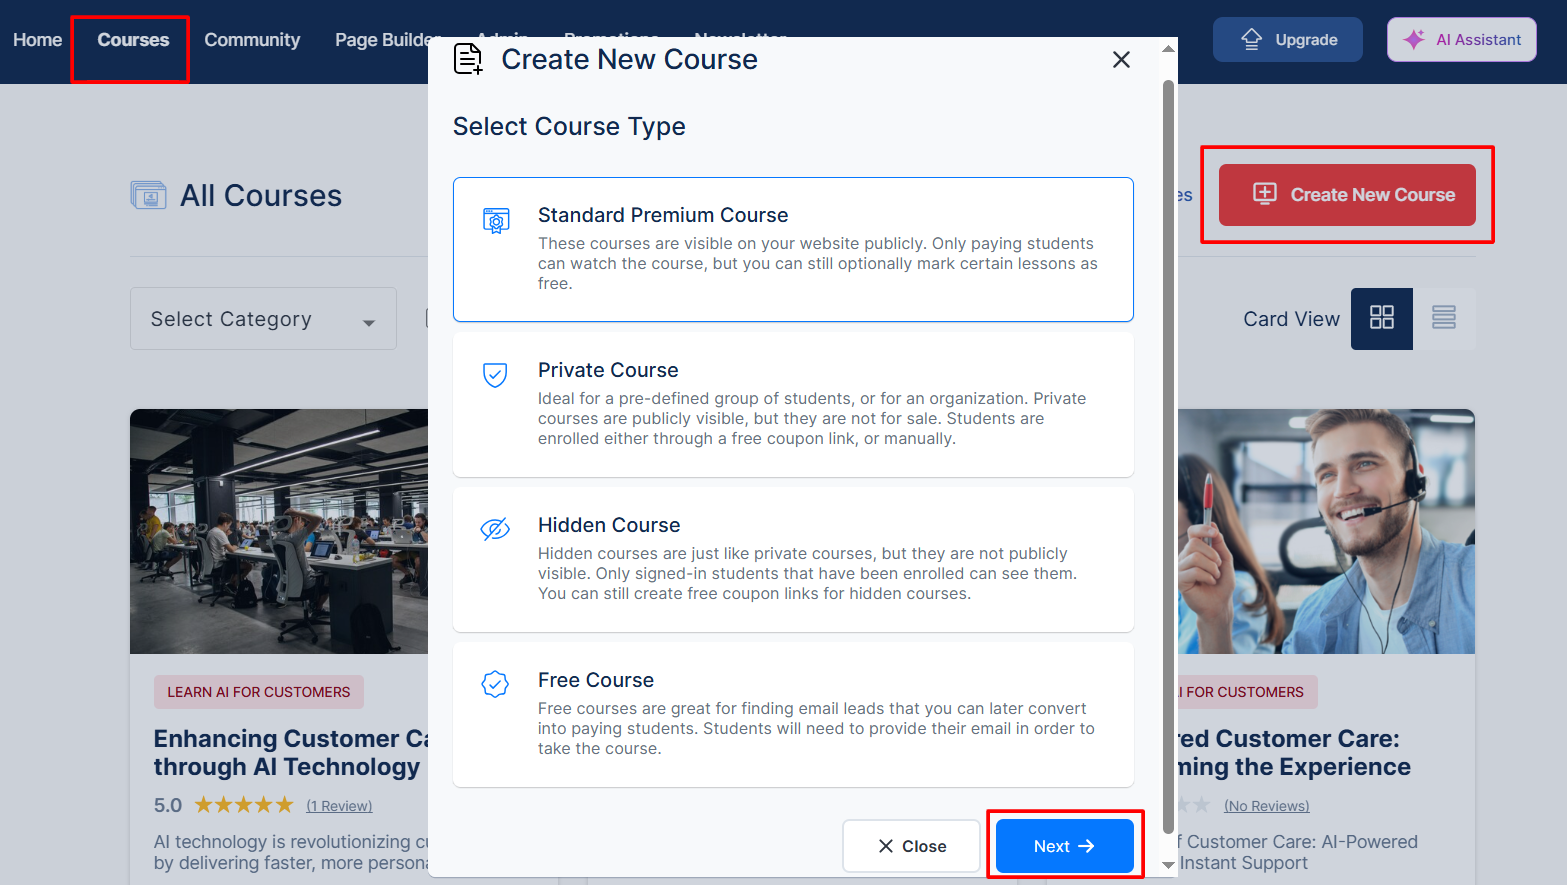
Step 1: Create a course
Log in to your account ⇒ click Courses ⇒ select Create New Course ⇒ choose your preferred course type (i.e., Standard Premium Course) ⇒ click Next.
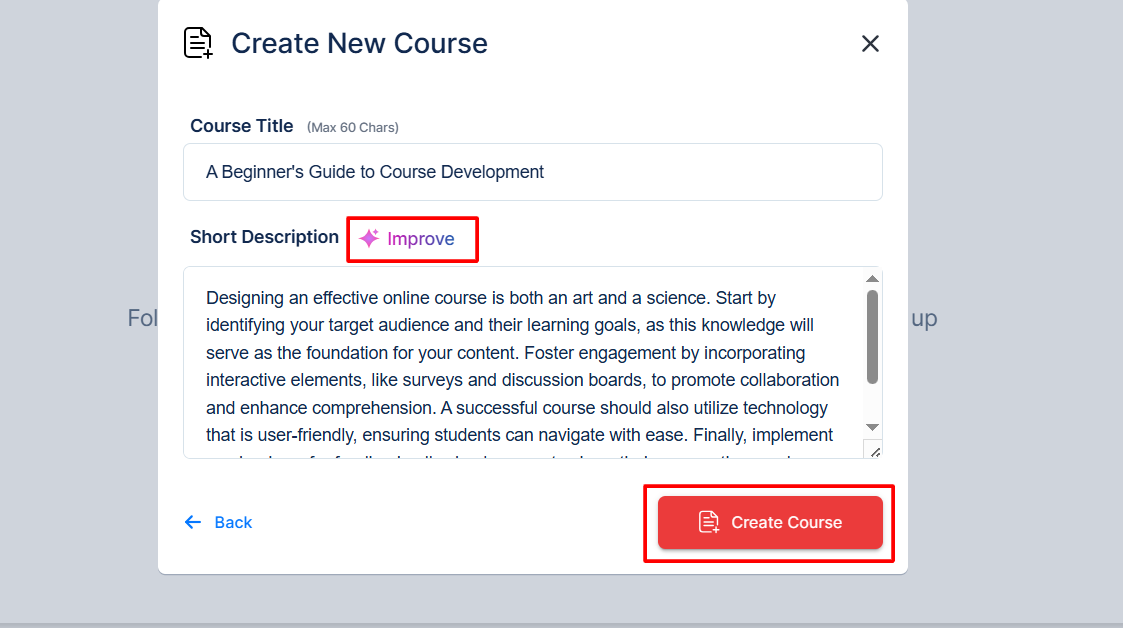
Every course you publish online must have a title and a brief description. The title helps learners quickly understand what your course is about, while the description provides a snapshot of what they can expect to learn.
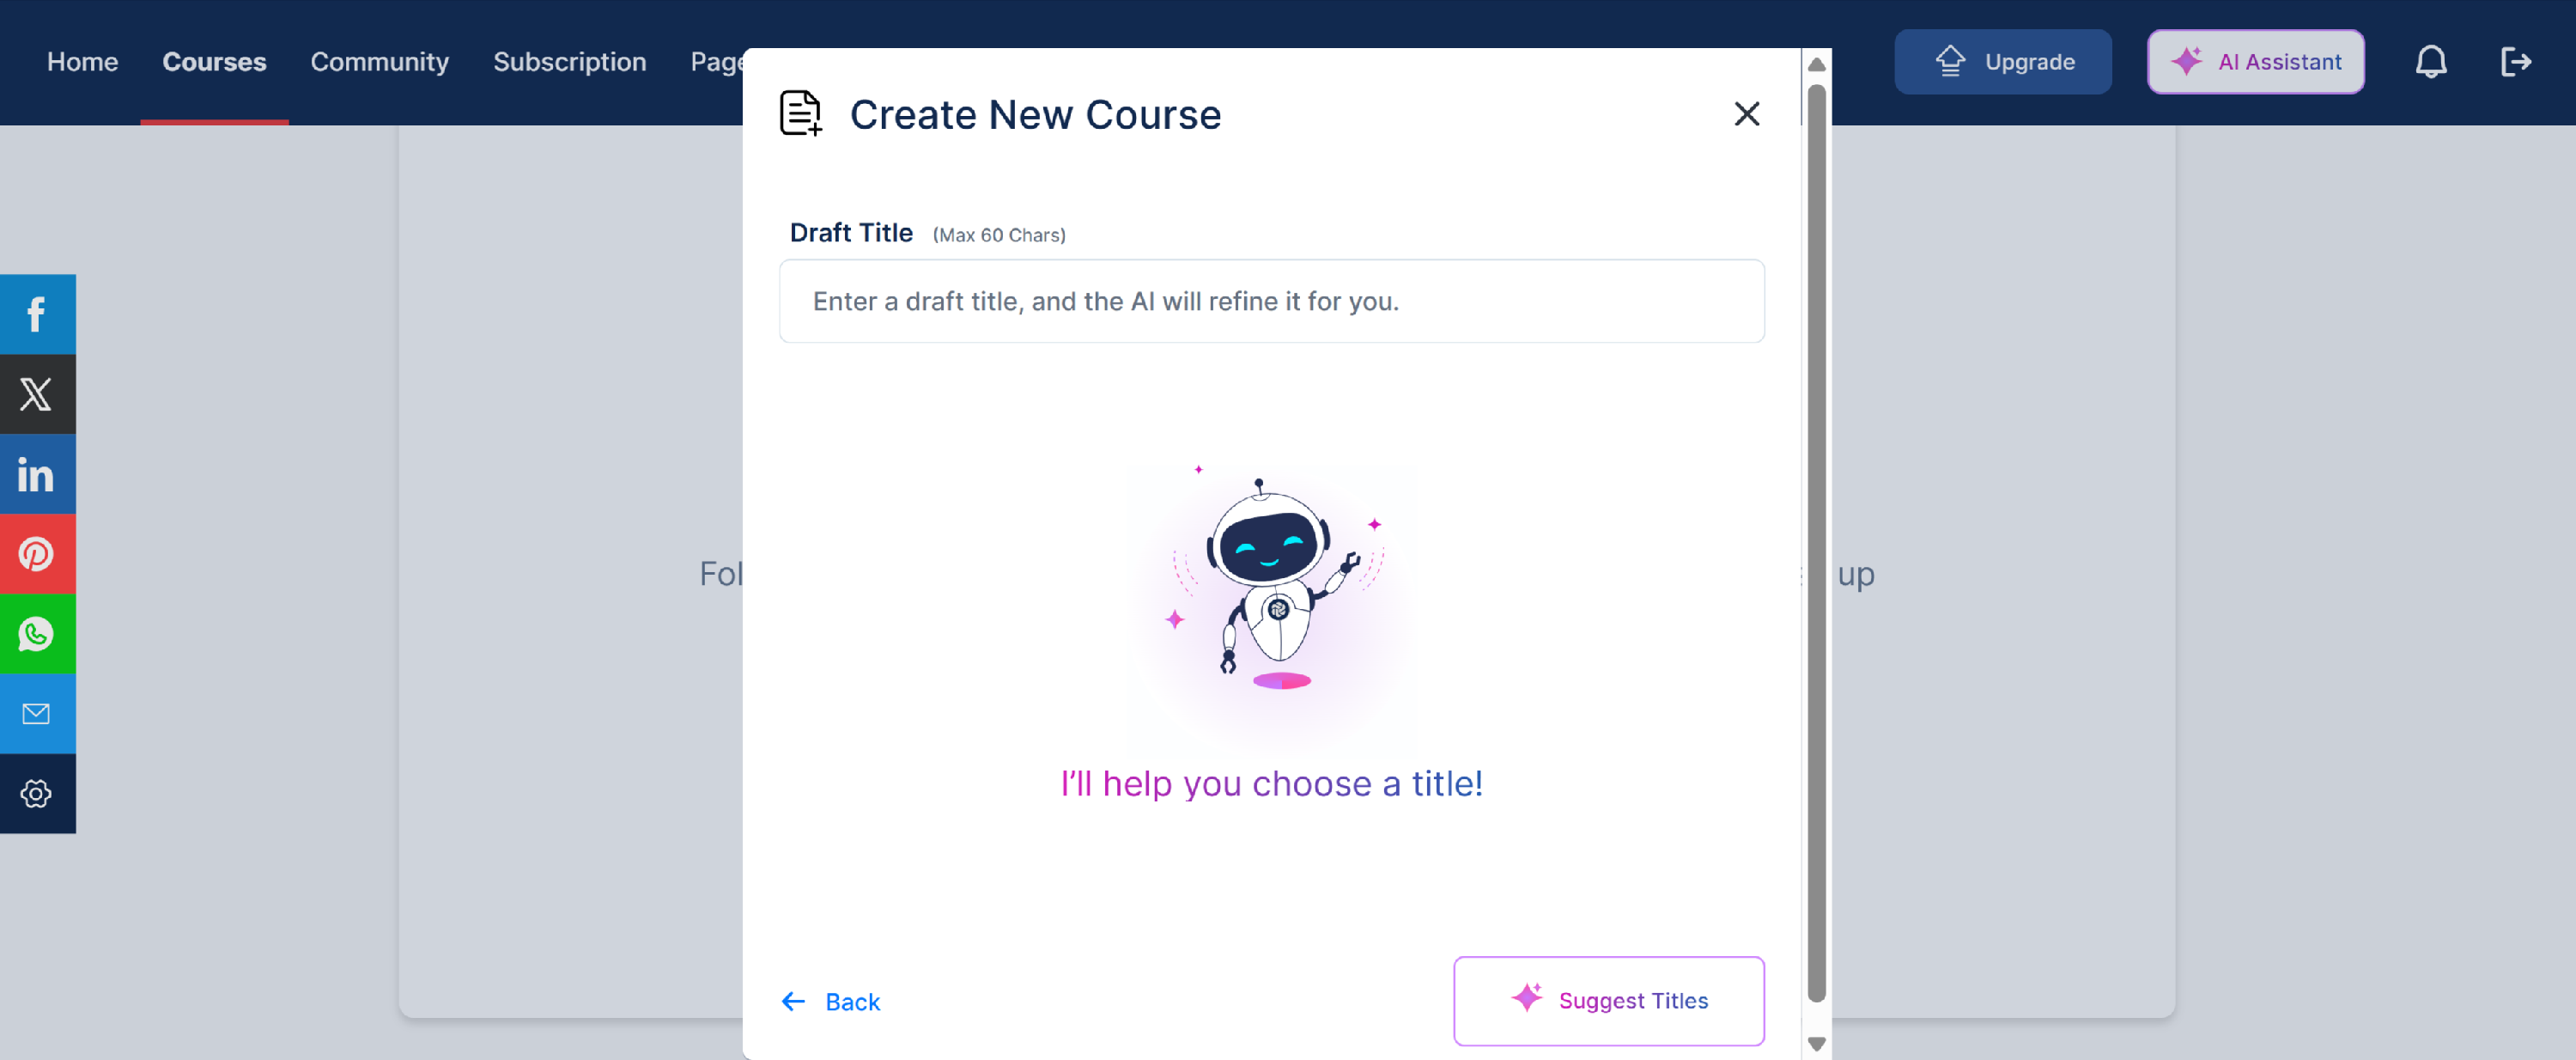
Note: You can also allow the AI Assistant to suggest the best title for your course. You just need to add the title, click on the Suggest Titles button, and the AI will refine the title for you, or you can select your version.
Once the title and description are finalized, click on the Create Course button.
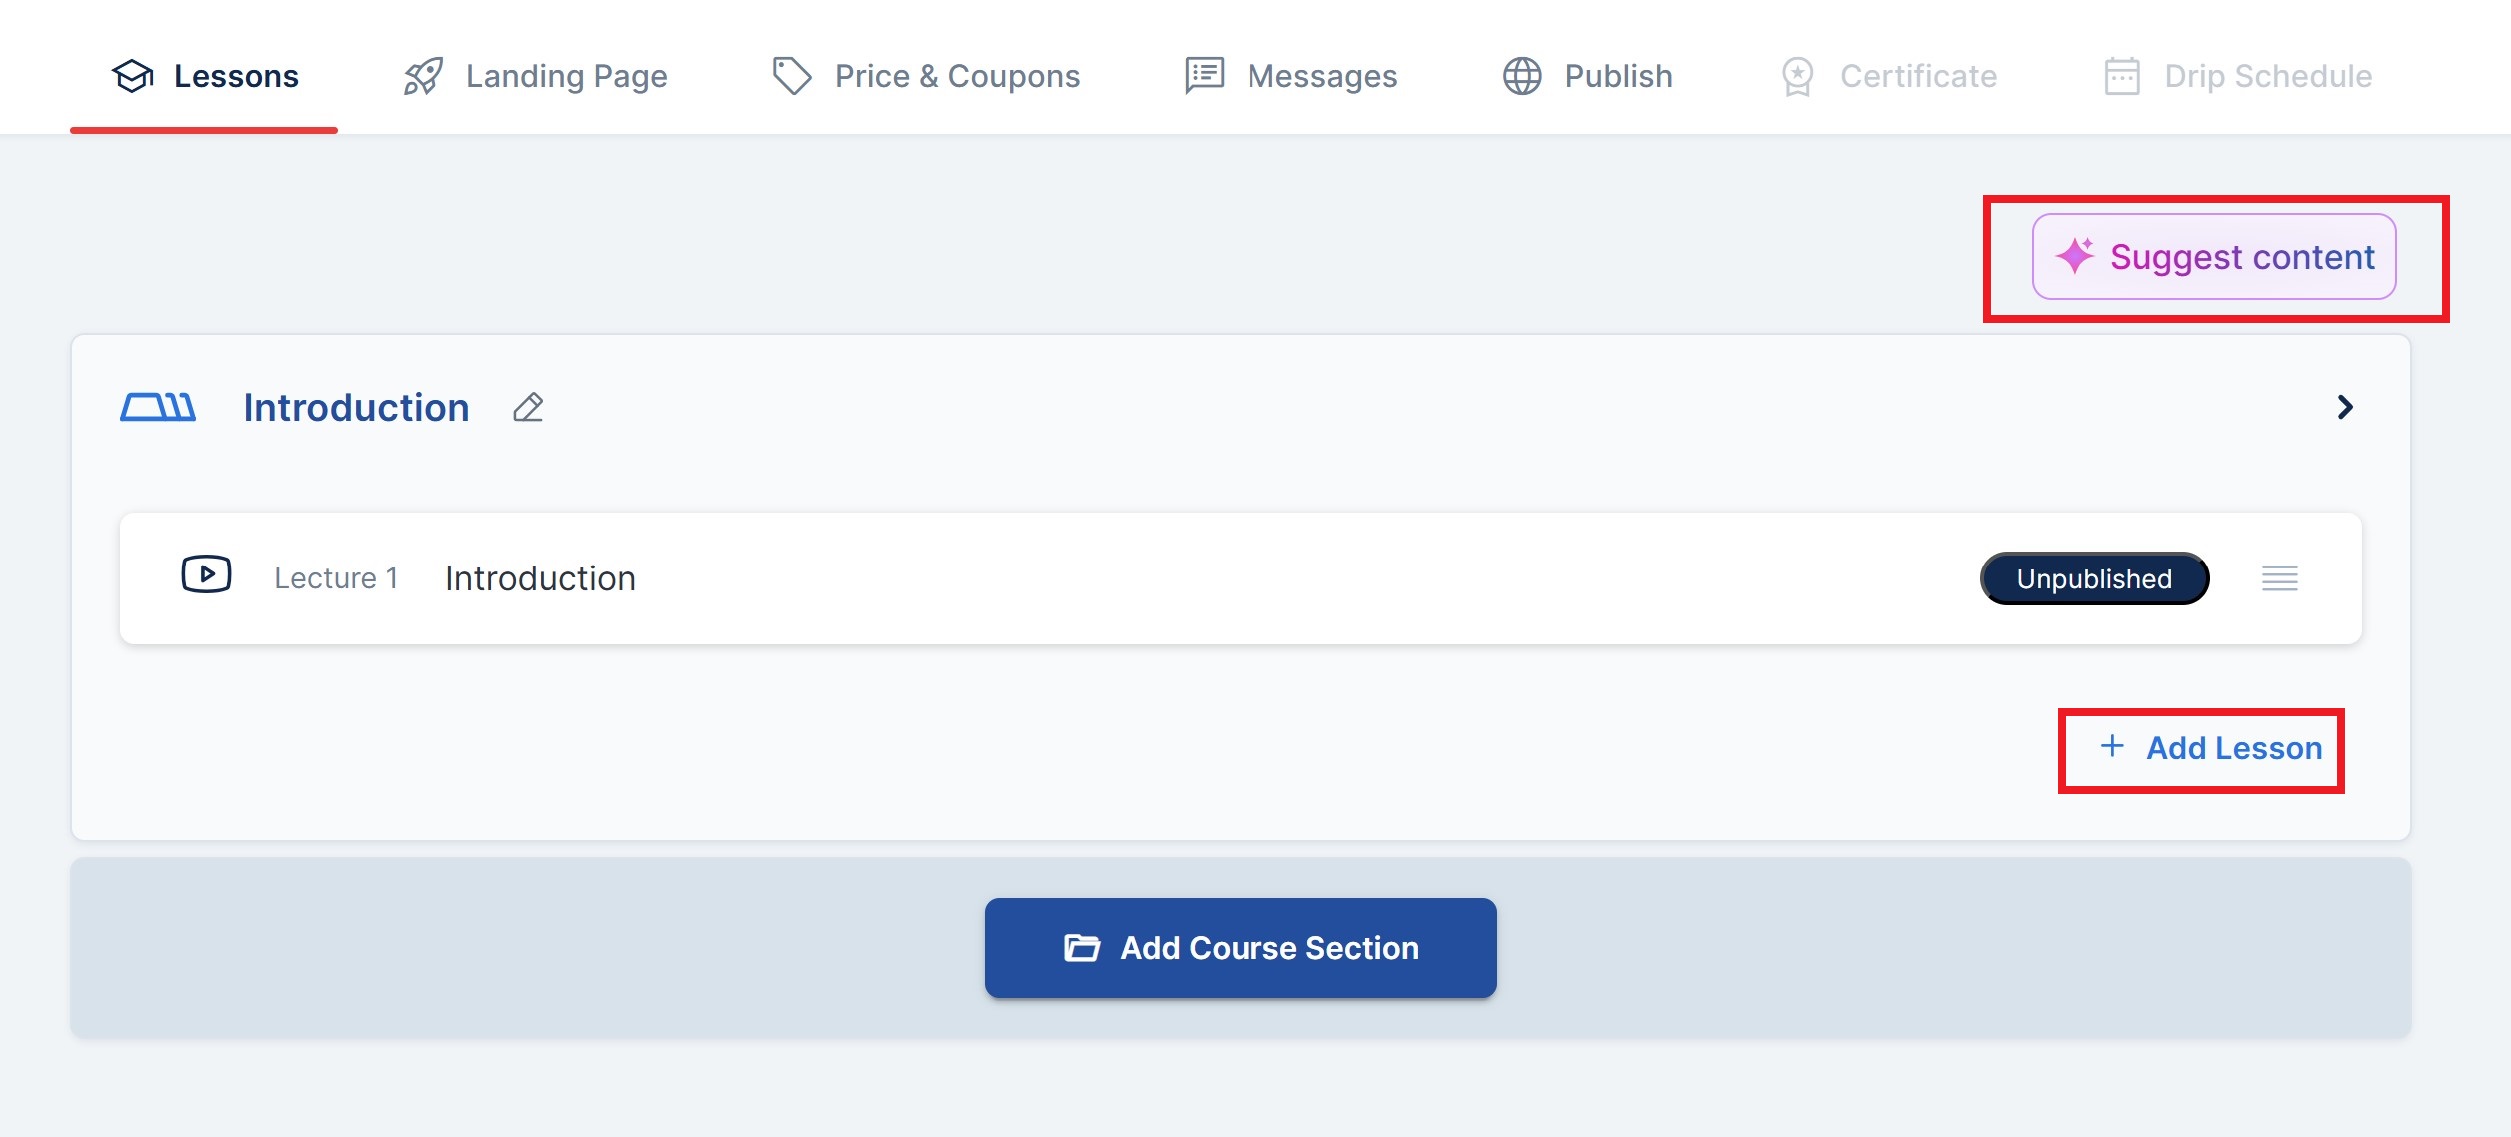
Under Lessons, an introductory course section and lesson will be provided to help you get started. You can either edit or delete the introduction as needed.
Note: You can also use the AI to suggest content for your lesson, or simply click on the Add Lesson button to add your lesson.
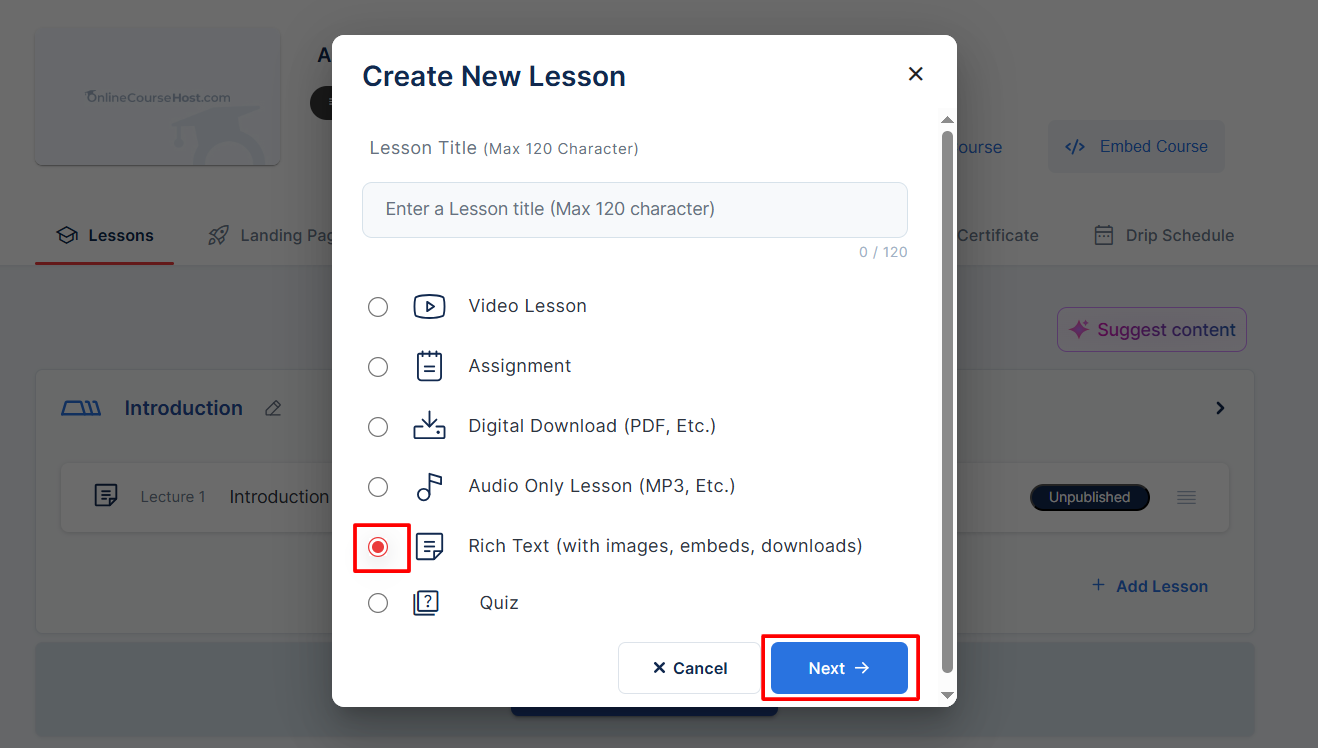
Step 2: Choose your type of lesson
Click the Add Lesson button ⇒ enter the lesson title ⇒ check the Rich Text box ⇒ click the Next button.
On the next screen, you'll have the option to refine your lesson title and add a description. This section includes AI support to help enhance your content. To use AI assistance, simply click the AI buttons provided. If you prefer to enter your text, select the Create Manually option.

Step 3: Write your text lesson
On this screen, you can enter your text and make additional changes, as outlined below:
Lesson Title
You can update the lesson title here or use the AI Improve button to do this.
Free Lesson / Prerequisite
- Enable Free Lesson to make this lesson accessible without payment or signing up.
- Enable Make this lesson a prerequisite to require learners to complete it before proceeding to other lessons.
Description
You can manually write your lesson description or use the AI-powered Improve feature to generate or refine it.

Lesson Editor Toolbar
Use the toolbar to:
- Insert code
- Add links
- Insert images
- Use AI tools - the pink T icon corrects spelling and grammatical errors, while the pink Image icon creates an image for your lesson content.
- Add tables
- Embed HTML
- Attach files
Note: Kindly refer to this link for detailed steps on how to embed and highlight a text description: How to embed and highlight a text description.
Once you’ve added your text, images, and any necessary files, click the Save and Publish buttons.
Step 3: Review and Publish the Course
Navigate to the Publish menu and carefully review all the listed requirements. Make sure each item is checked to ensure your lesson meets the platform's publishing requirements.

Once all requirements are fulfilled, click Publish to finalize and make your course available to learners.
Step 5: View your Course
After publishing your Rich Text lesson, it will become accessible to your students.
To view your course as a student, click Courses => View Course, and you will be taken to the course.