How to embed and highlight on a text description
The buttons to embed links or images are important to a course creator. These embedding icons are available for a rich text lesson, and the lesson descriptions of every other type of lesson.
Below are the steps to take:
Step 1: Create a course
Login to your account => click courses => Create New Course => add the course title and description and create course.
Under lessons, write a new course section => create section.
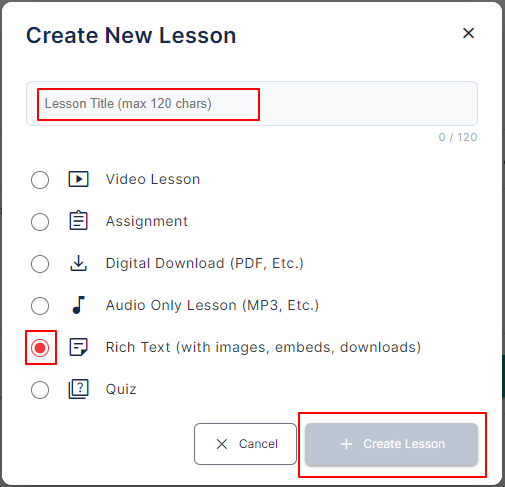
Step 2: Choose your type of lesson
Click the add lesson button => add a lesson title => tick the Rich Text box and click Create Lesson.
Step 3: Embed links, images, and videos.

To embed a link (maybe for an external website), you have to write out the description of the link and highlight it before clicking on the first icon for embedding links.

To embed an image, click the second button and pick your image from your computer

Please note that for videos, you can only embed a link to the video, you can't import the video as a whole.

With this, you have so many ways to give your students additional information.
Step 4: Highlight some texts
To highlight a paragraph/sentence, highlight a word and click the fourth icon on the list.

Note that you can undo the changes you have made by clicking the icon again or Ctrl Z
Step 5: Embed a document.
To do this, click the last button and select your document from your computer.

This document will show under your text, and your students can download them when they finish the lesson.