How to set up Drip Schedule
Drip Schedule lets you control how students access your course content. You can choose to release entire sections on specific dates, or unlock them automatically a set number of days after enrollment.
This ensures students progress through the material at your preferred pace, preventing them from jumping ahead.
Pro Tips for Effective Drip Content
𝐄𝐧𝐠𝐚𝐠𝐞𝐦𝐞𝐧𝐭 𝐁𝐨𝐨𝐬𝐭: No more information overload! Drip content allows students to digest information at a manageable pace, leading to better comprehension and a higher chance of completion.
𝐃𝐞𝐞𝐩𝐞𝐫 𝐋𝐞𝐚𝐫𝐧𝐢𝐧𝐠: Drip content fosters a structured learning path where students can focus on each module thoroughly before moving on. This promotes a deeper understanding and a more rewarding learning experience.
𝐈𝐧𝐜𝐫𝐞𝐚𝐬𝐞𝐝 𝐂𝐨𝐮𝐫𝐬𝐞 𝐕𝐚𝐥𝐮𝐞: The "coming soon" effect creates an air of anticipation, making your course feel exclusive and valuable. This can justify your pricing point and even increase perceived value.
𝐏𝐥𝐚𝐧 𝐘𝐨𝐮𝐫 𝐂𝐨𝐧𝐭𝐞𝐧𝐭 𝐒𝐜𝐡𝐞𝐝𝐮𝐥𝐞: Break down your course into digestible modules and set a release timeline that balances pacing with student motivation.
𝐕𝐚𝐫𝐢𝐞𝐭𝐲 𝐈𝐬 𝐊𝐞𝐲: Combine video lectures, quizzes, downloadable resources, and hands-on assignments to maintain engagement across modules.
𝐈𝐧𝐭𝐫𝐢𝐠𝐮𝐞 𝐰𝐢𝐭𝐡 𝐏𝐫𝐞𝐯𝐢𝐞𝐰𝐬: Tease upcoming content through email announcements or in-course notifications to build anticipation.
𝐋𝐞𝐯𝐞𝐫𝐚𝐠𝐞 𝐀𝐮𝐭𝐨𝐦𝐚𝐭𝐢𝐨𝐧: Utilize the built-in tools of Onlinecoursehost.com to efficiently schedule and deliver content, thereby ensuring consistent student progress.
You can activate Drip for your course by clicking Edit → Drip Schedule → then toggling the button Activate Drip.
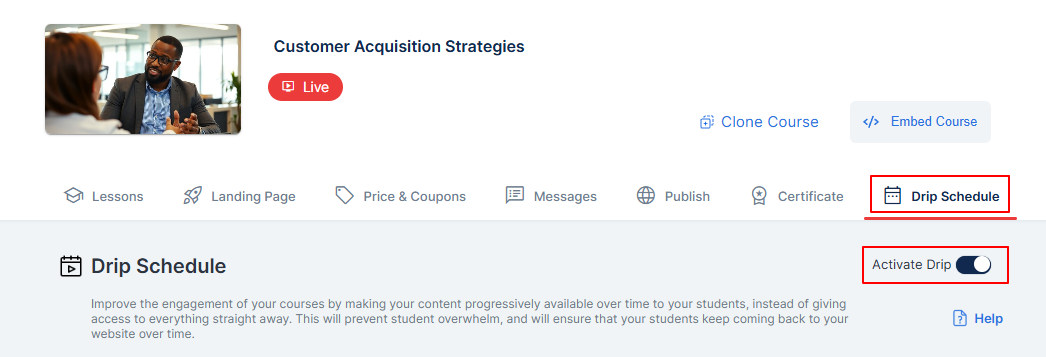
Note: The Drip feature only works per course, meaning you can have multiple drip courses active on your account.
How to activate your drip feature
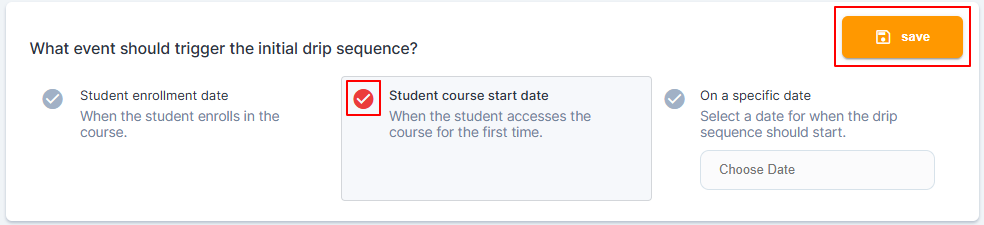
STEP 1: Click Activate Drip → then click the checkbox of the initial trigger for the drip sequence.
STEP 2: Activate a sending email if you have not set up your bulk email sending address.
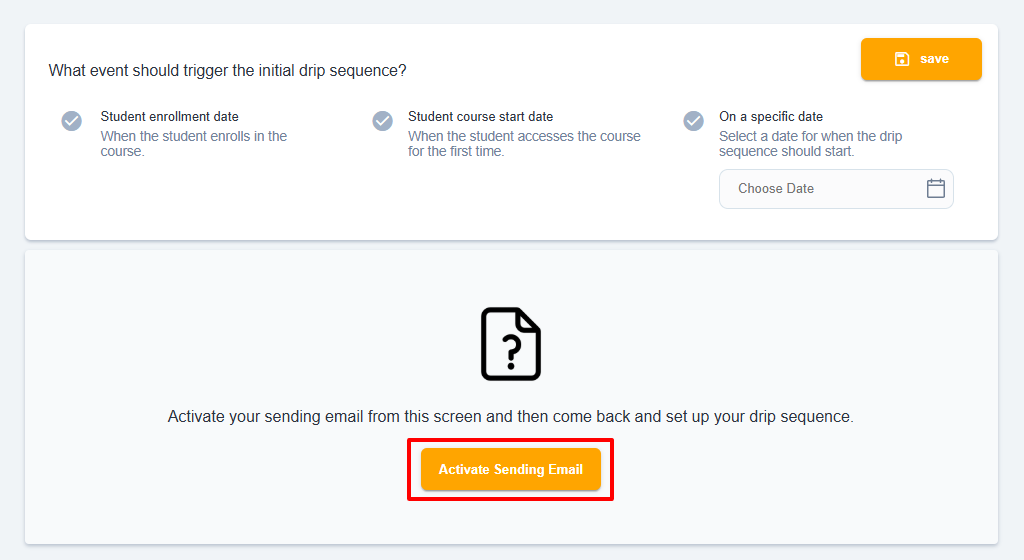
You can refer to this link for more information on how to set up your bulk email.
STEP 3: Now, click on the drop-down arrow for the course section on the right side of the start screen to start customizing the drip schedule.
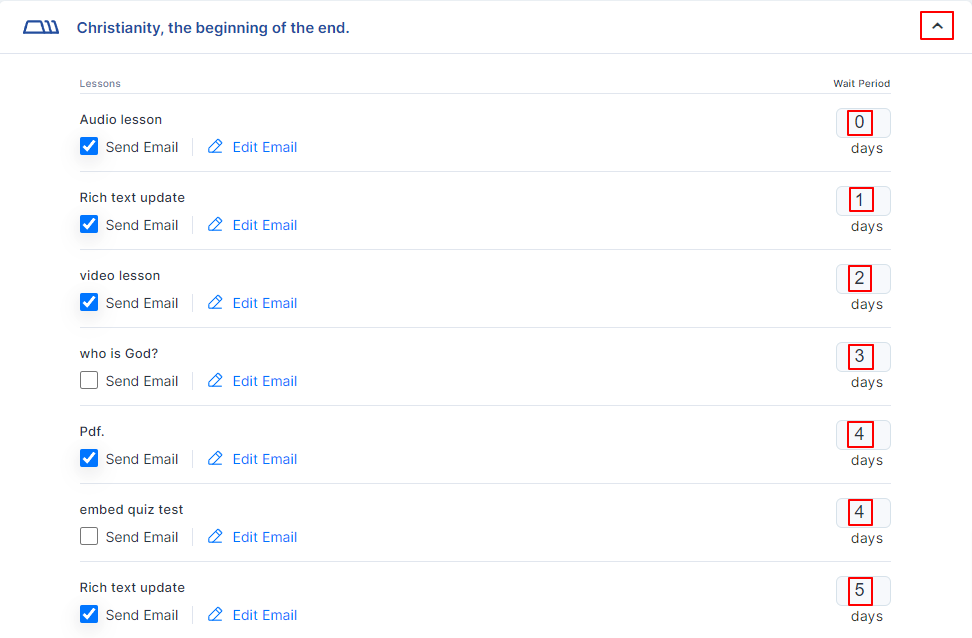
STEP 4: For those lessons that require a release schedule unique to each lesson, you should enter the days after the start date of each lesson that you wish to release the lesson.
When a lesson is left at 0 days, students can access it based on the initial trigger you selected in Step 1.
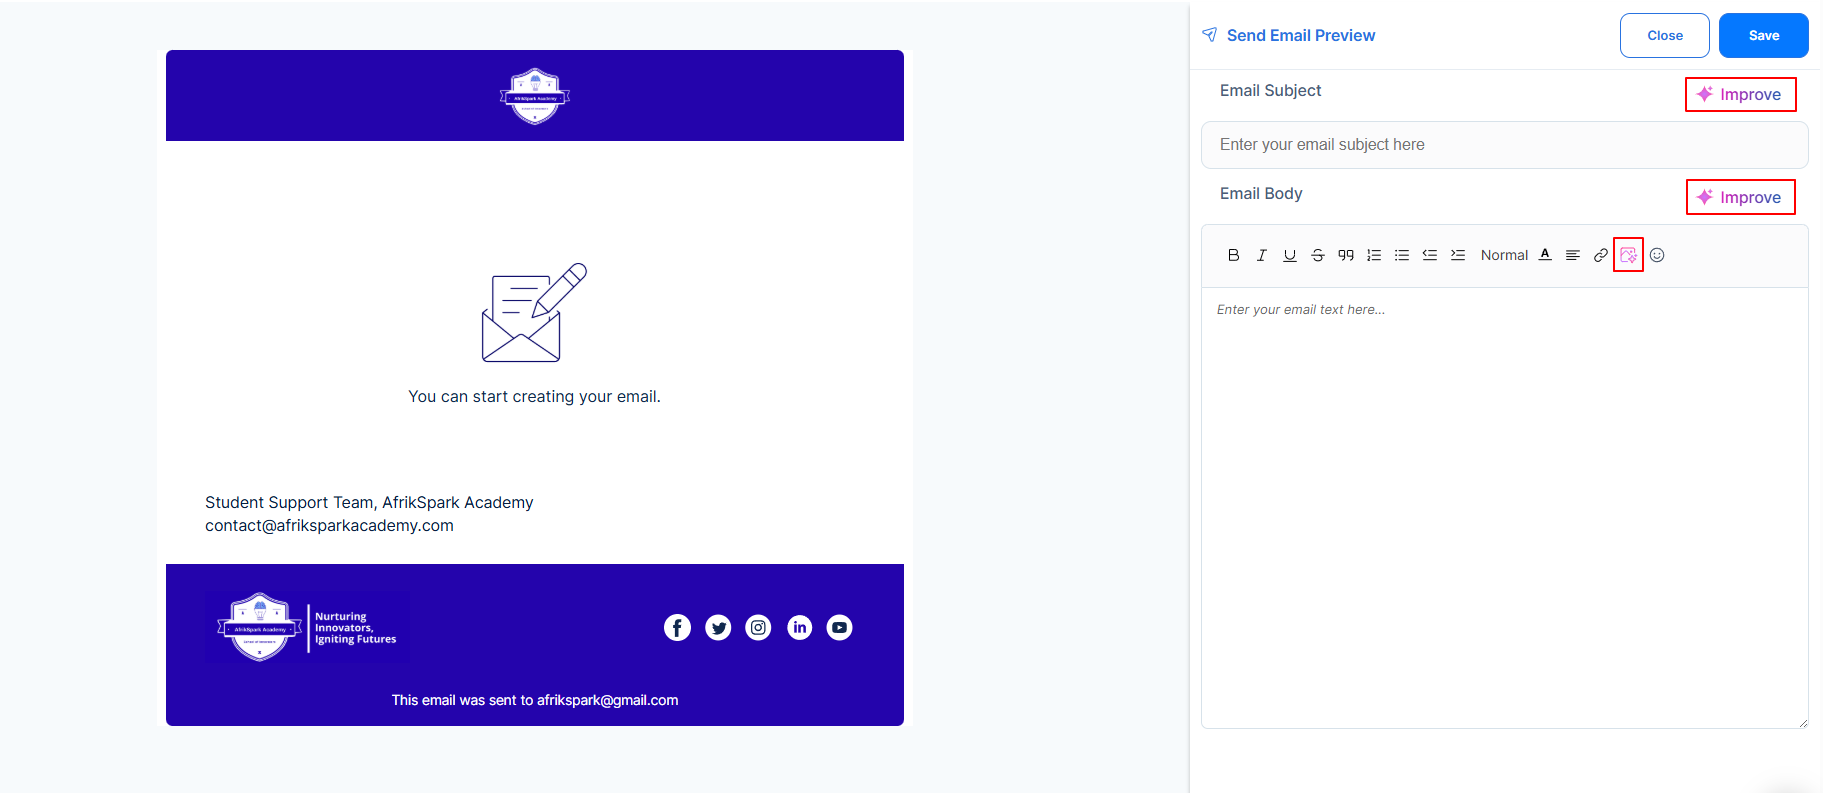
STEP 5: This is optional. If you would like to notify your students via email that a particular lesson has been drip-fed for them.
Click the Send Email check box → then click Edit Email to edit the subject and body of the email.
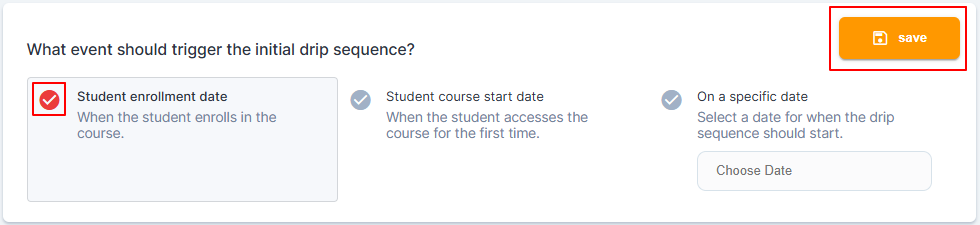
STEP 6: Click Save on the top right.
The initial trigger for the Drip Sequence
Choosing what event would trigger the drip sequence for your newly enrolled student would be best. There are three event triggers to pick from, and they are:
- Student enrollment date
- Student course start date
- On a specific date
When setting up a Drip schedule, please note that one date in UTC may be another in your local time zone. For example, Onlinecoursehost servers use UTC +0 as their time zone, which cannot be manually changed.
Student enrollment date
This drip sequence is based on when your student enrolls in your course for the first time. Depending on the date each student starts, each will have their own schedule.
In this drip option, you can customize the number of days. The day your student enrolls in the course for the first time is considered day 0.
A new student, for example, could have access to Section 1 Lesson 1 immediately (day 0), be given access to Section 1 Lesson 2, 7 days after enrolling, and access to Section 1 Lesson 3, 14 days after enrolling.
Student course start date
A drip is triggered when a student accesses the course for the first time.
In the case of manual enrollment, this feature is very useful because even though your students are enrolled in your course, they may not be able to access the content right away.
The drip schedule will only begin when a student specifically accesses lessons in the Course Player.
This drip option is customizable in days. It is on day 0 that your student first accesses the Course Player for this course.
A student could, for example, access Chapter 1 lessons right away (day 0) when they visit the Course Player for your course, and Chapter 2 and Chapter 3 lessons seven days later.
On a specific date
Every student will have the same Drip Schedule regardless of when they enroll in your course if the drip relies on a specific date. You can use this option for cohorts that want to progress through a course together.
The content will be available at 12:01 am, in your local time, on the date set for the Drip Schedule.
When you set your Drip Schedule to Jan. 1st, 2024, students who sign up before Jan. 1st cannot access the course until 12:01 am on Jan. 1st, 2024.
All students worldwide can access the same content simultaneously, and your content will be accessible immediately to students who sign up after 12:01 am UTC on January 1st, 2024.
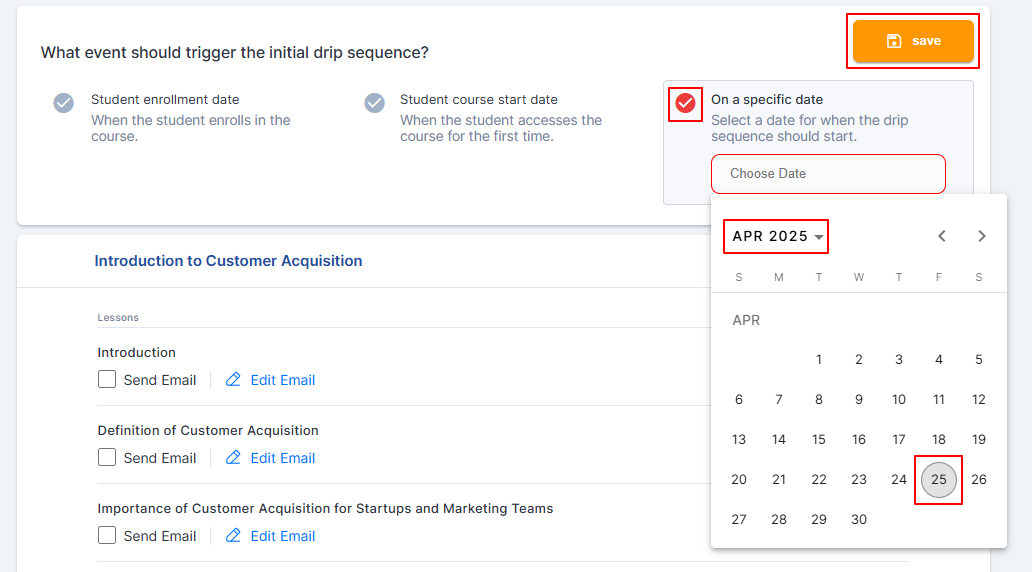
How to set up a drip on a specific date
STEP 1: Click the Activate Drip button
STEP 2: Then click the checkbox “On a specific date”
STEP 3: Click the calendar icon and select your desired release date. The same applies to all the lessons in the course. You can customize each lesson individually later.
STEP 4: Click the Save button in the top right corner, as shown in the screenshot below:
Summary of Drip Event Triggers:
| Trigger Type | Best For | Example |
|---|---|---|
| Enrollment Date | Self-paced courses | Lesson 1 (Day 0), Lesson 2 (Day 7) |
| Course Start Date | Cohort-based learning | Content unlocks when a student first accesses the course |
| Specific Date | Live cohorts | All content unlocks January 1, 2024 |
Set up a drip announcement
If you would like to notify your students that a lesson has been released for them, then ensure to click the Send Email checkbox for that particular lesson.
You can also edit the subject and body of each email your students receive by clicking the Edit Email button.
You will also be required to activate your sending Email for the Drip. Check out our helpful article on how to activate bulk email.
STEP 1: Click the Send Email checkbox and the Edit Email button.

STEP 2: Fill out the email form to schedule an email letting students know when the course section will become available. Fill in the email subject and body, then click Save Email.
Note that drip emails are sent out every day by 10 am CET.
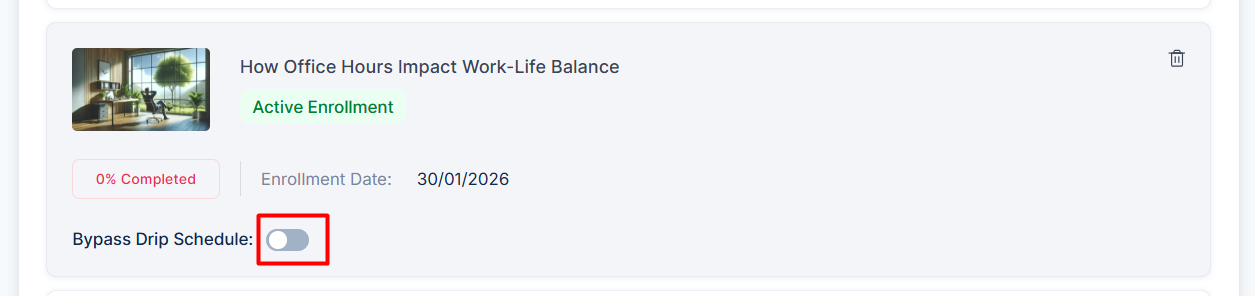
Can I disable drip per student?
Yes, to do this, go to Admin => Students => Manage Students => Search and click the student's name => click Enrollments and toggle the slider to bypass the drip schedule.
IMPORTANT NOTES
The bulk email functionality must be activated to utilize the drip feature.
You have to edit the email for each lesson you have checked the send email button.
To disable email announcements, uncheck the Send Email button, and the email announcement will not be sent to your students.
Kindly see our FAQs about the drip Schedule here.