How to create an audio-only lesson
Introduction
An Audio-Only Lesson allows you to teach using recorded audio clips. This format is especially convenient for students, as they can listen to the course content while multitasking, making it a popular and flexible learning option.
Below are the simple steps to help you create an audio-only lesson.
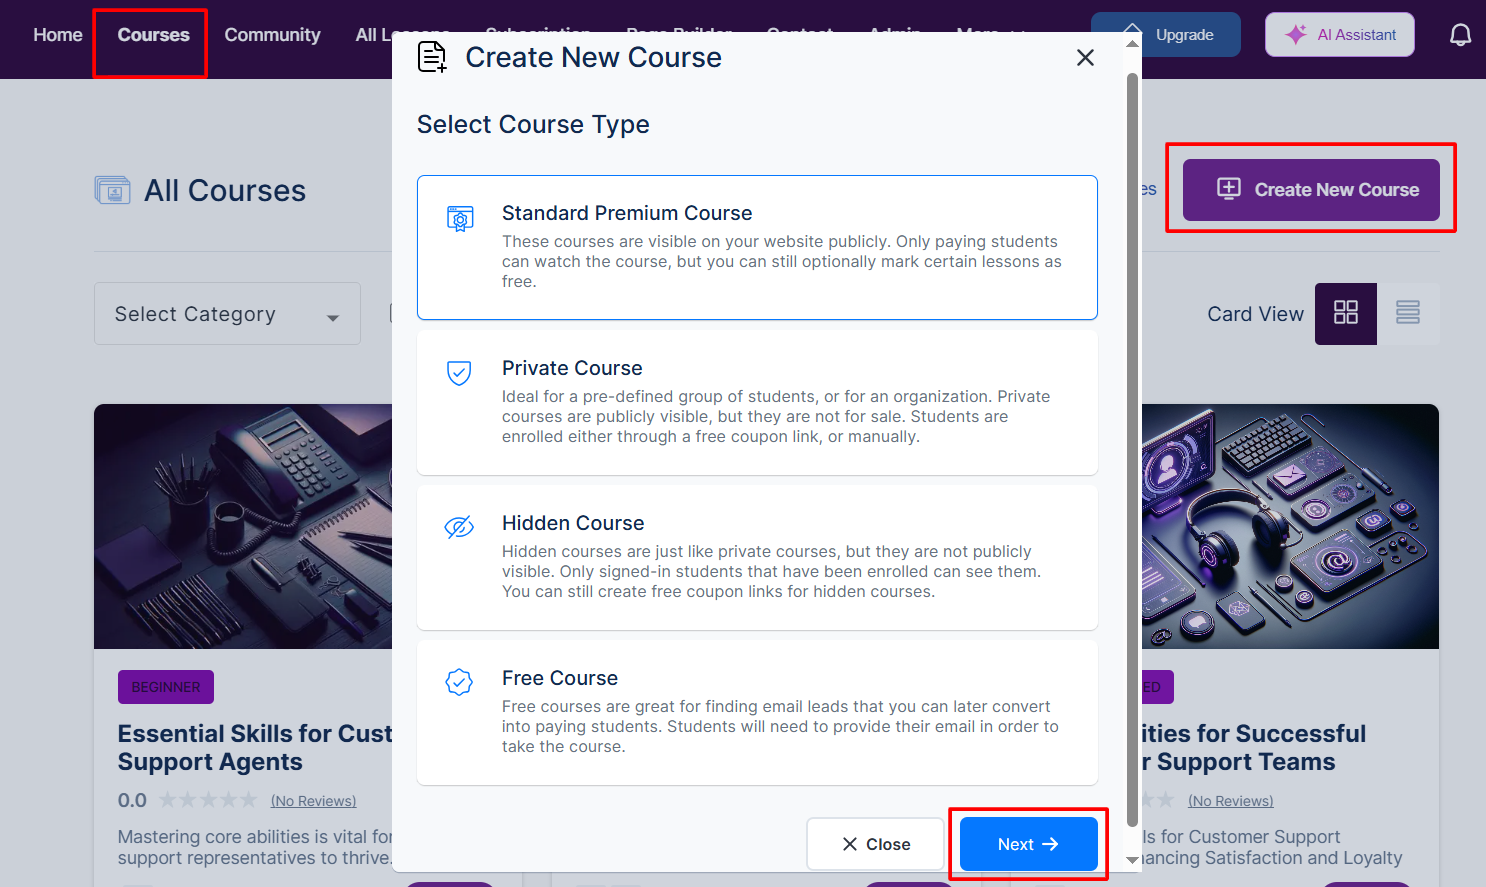
Step 1: Create a course
Login to your account ⇒ click Courses ⇒ select Create New Course ⇒ choose your preferred course type ⇒ and click Next.
Choose a course title and write a short description: Every course you publish online must have a title and a brief description. The title helps learners quickly understand what your course is about, while the description provides a snapshot of what they can expect to learn.
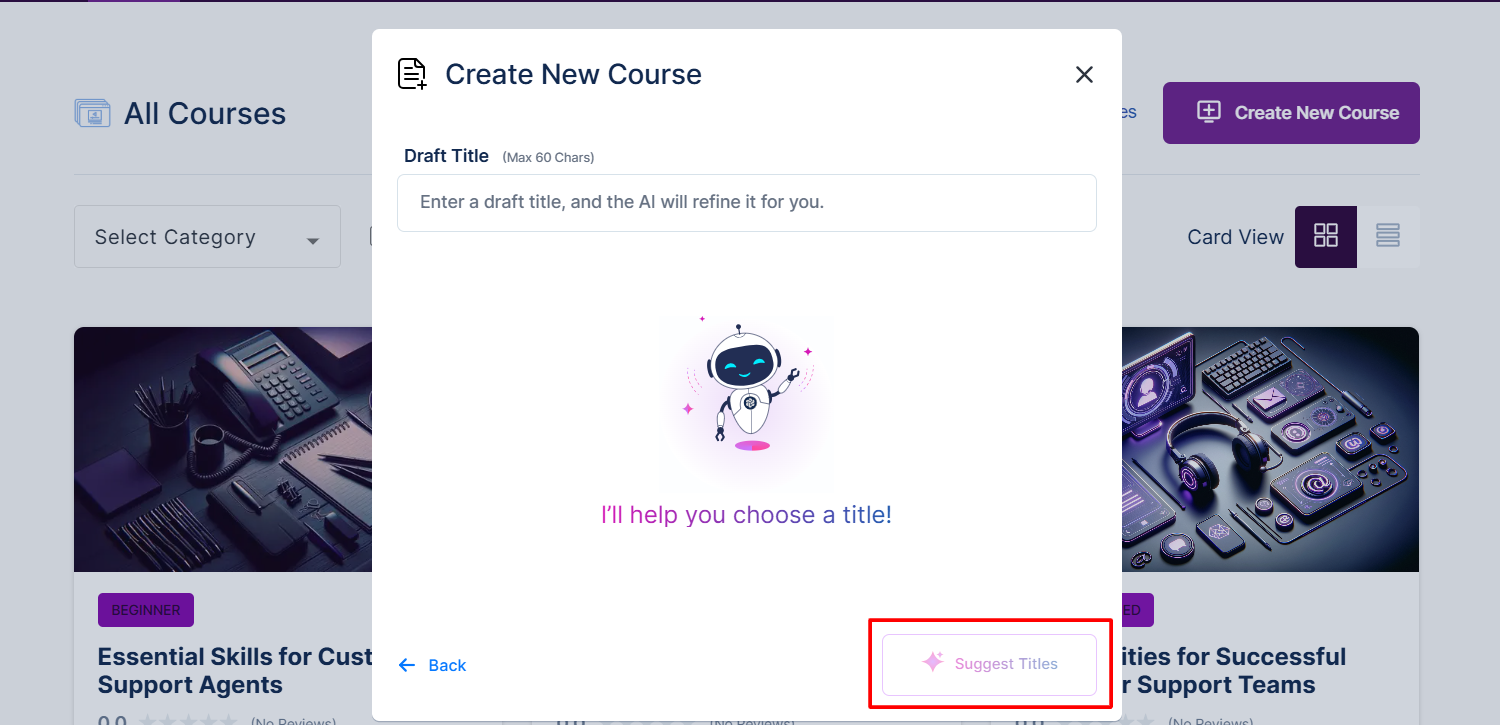
Note: You can also ask the AI to suggest the best title for your course. You just need to add the title, click on the Suggest Titles button, and the AI will refine the title for you, or you can select your version.
Once the title and description are finalized, click on the Create Course button.

Under Lessons, an introductory course section and lesson will be provided to help you get started. You can either edit or delete the introduction as needed.
Note: You can also use AI to suggest content for your course, or simply click on the Add Lesson button to add your lesson.

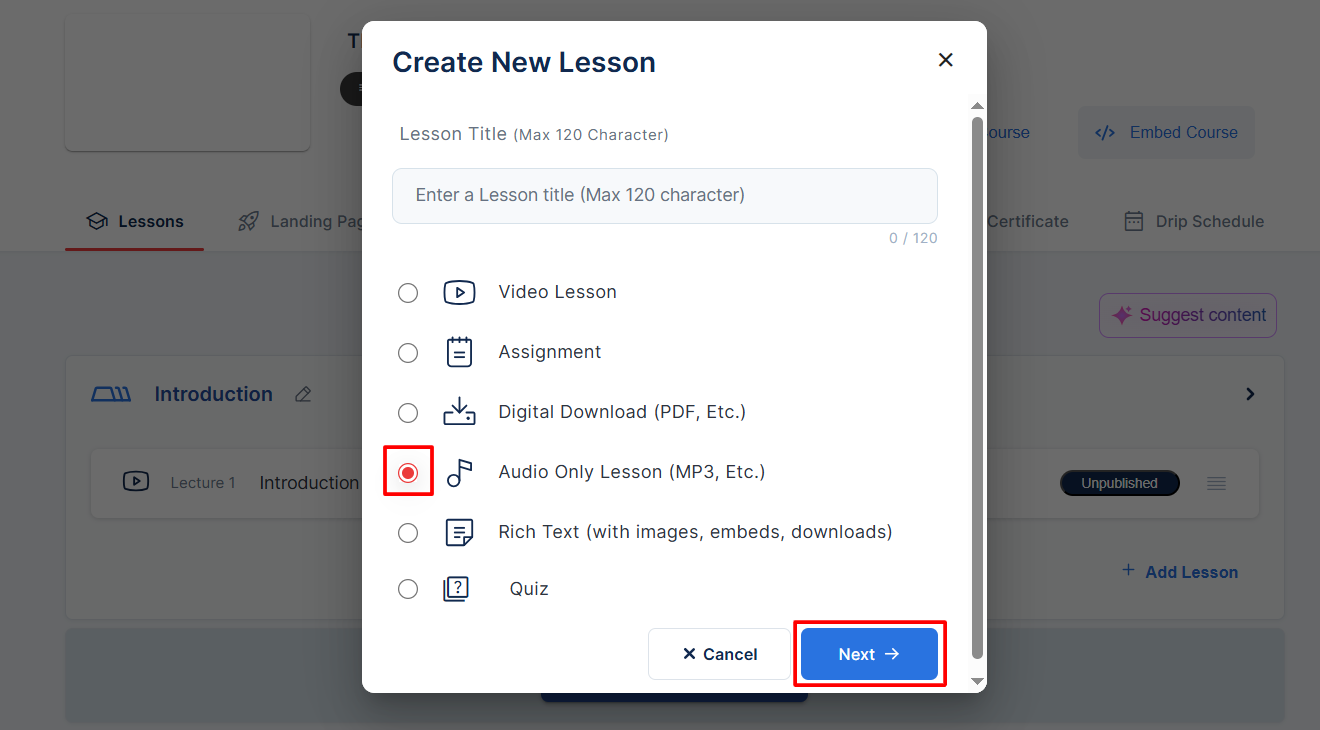
Step 2: Choose your type of lesson
Click the Add Lesson button ⇒ enter the lesson title ⇒ check the Audio Only Lessons (MP3, etc.) box ⇒ click the Next button.
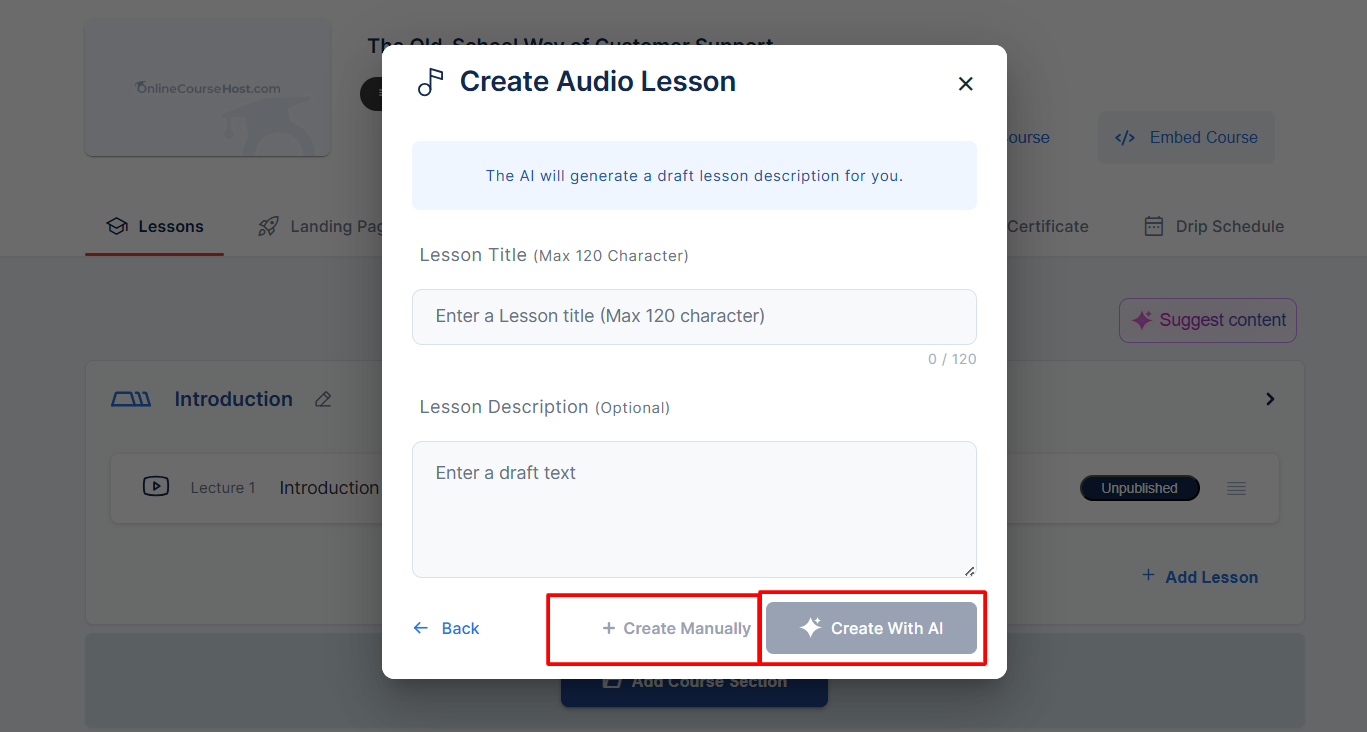
Add a lesson title and description: In this step, provide a clear Lesson Title and a brief Lesson Description. The title should quickly inform students about the topic, while the description offers a short overview of what they will learn in the lesson.
Note: If you want the AI to generate the catchy description, click on the Generate with AI button at the bottom, and the AI will generate the description for you.
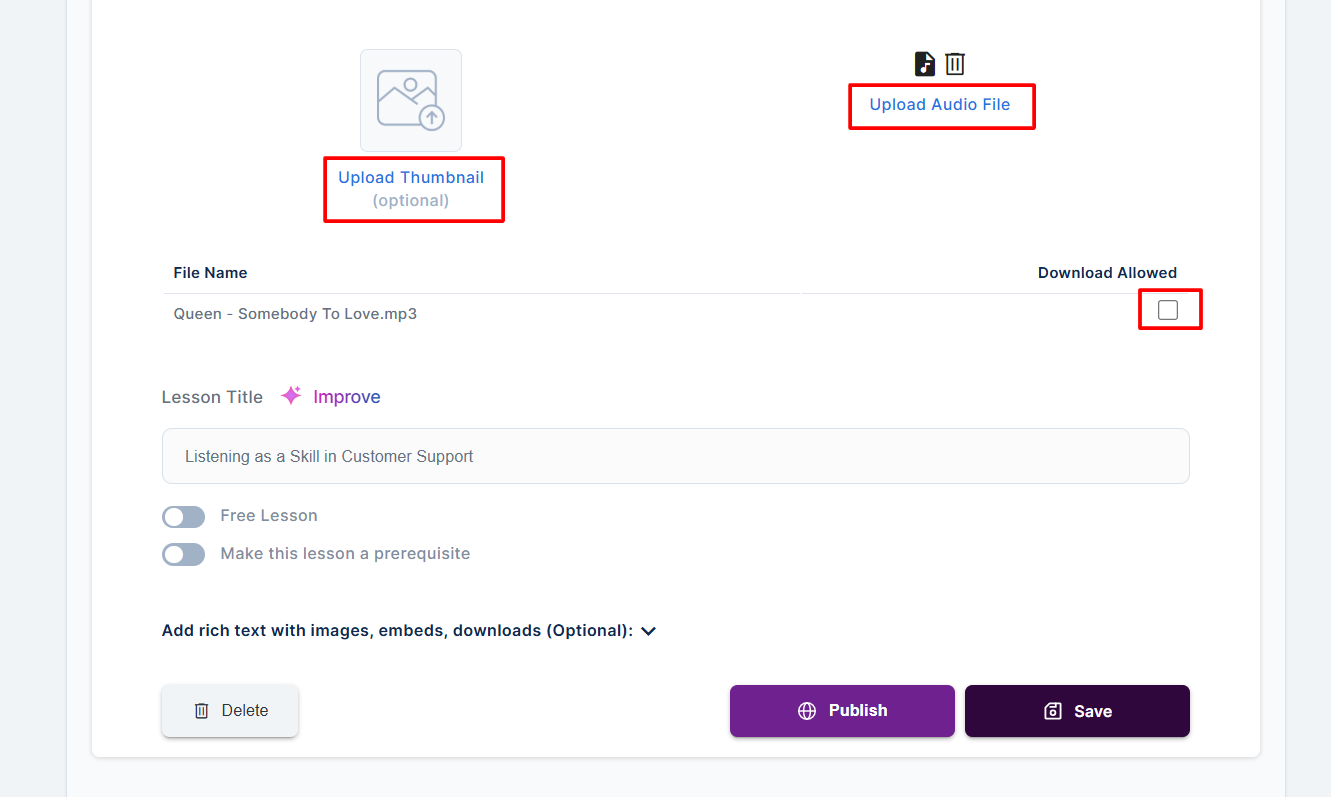
Step 3: Upload Your Audio File and Add a Thumbnail
Upload your audio file for the lesson, then add a thumbnail image to make it visually appealing.
Also, confirm if you want your audio file to be downloadable or not, by clicking the Download Allowed button.
Once done, scroll down the page to click Save and Publish.
Note: You can also add a short description of your audio file. This serves as a summary to help students better understand the context and content of the lesson.
Step 4: Review and Publish the Course
Navigate to the Publish menu and carefully review all the listed requirements. Make sure each item is checked to ensure your lesson meets the platform's publishing requirements.
Once all requirements are fulfilled, click Publish to finalize and make your lesson available to learners.
Step 5: View your course
After publishing your course, it will become available for students to access and download.
To view your course as a student, click Courses => View Course, and you will be taken to the course.

When you click on the Download Audio button, the audio file will be downloaded to your computer or mobile phone.