How to create a Digital Download lesson
Introduction
A Digital Download Lesson is designed to provide learners with downloadable content in the form of a digital file. While PDF e-books are among the most commonly shared formats, you can also offer ZIP files or virtually any other file type.
Below are the steps to help you create a digital download lesson effectively.
Step 1: Create a course
Log in to your account ⇒ click Courses ⇒ select Create New Course ⇒ choose your preferred course type (i.e., Standard Premium Course) ⇒ click Next.
Every course you publish online must have a title and a brief description. The title helps learners quickly understand what your course is about, while the description provides a snapshot of what they can expect to learn.
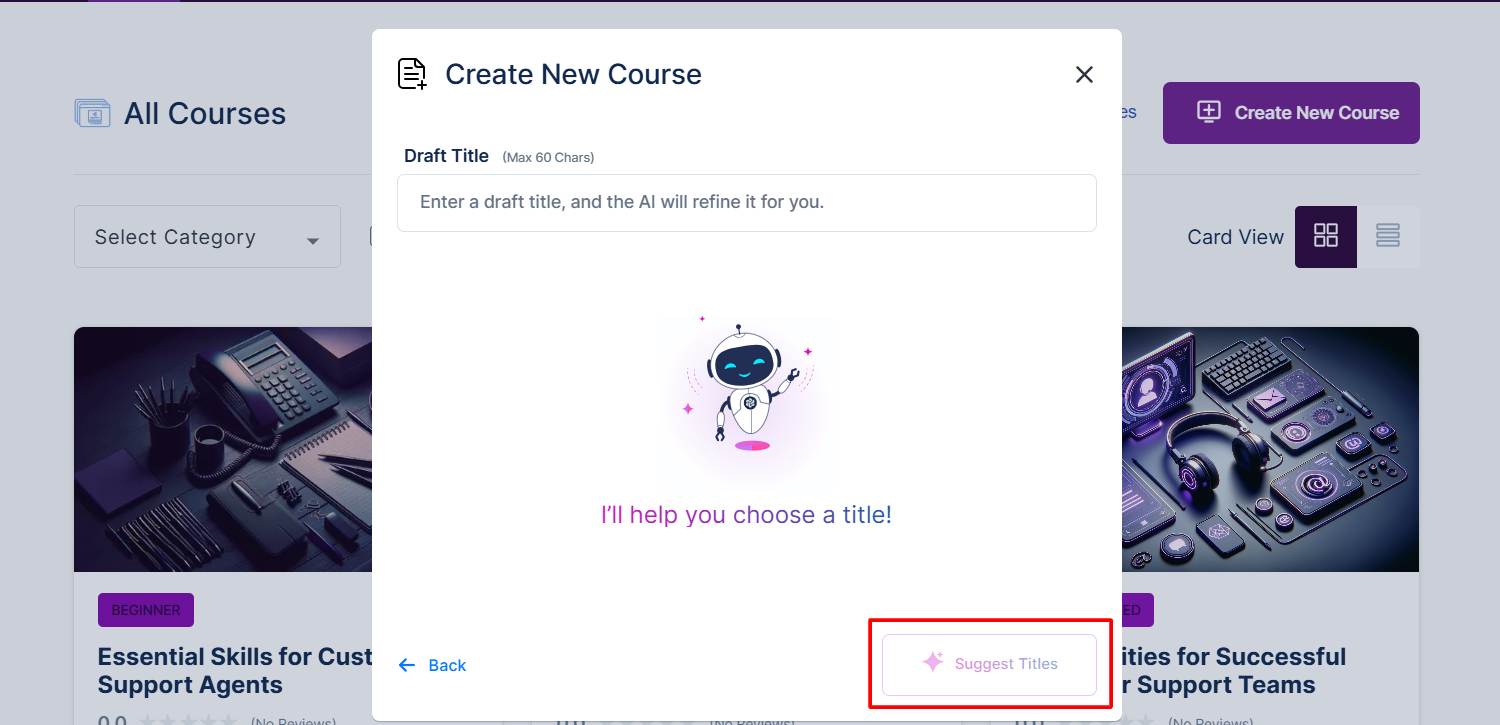
Note: You can also use the AI to suggest the best title for your course. You just need to add the title, click on the Suggest Titles button, and the AI will refine the title for you, or you can select your own version.
Once the title and description are finalized, click on the Create Course button.
Under Lessons, an introductory course section and lesson will be provided to help you get started. You can either edit or delete the introduction as needed.
Note: You can also use the AI to suggest content for your course or simply click on the Add Lesson button to add your lesson.

Step 2: Choose your type of lesson
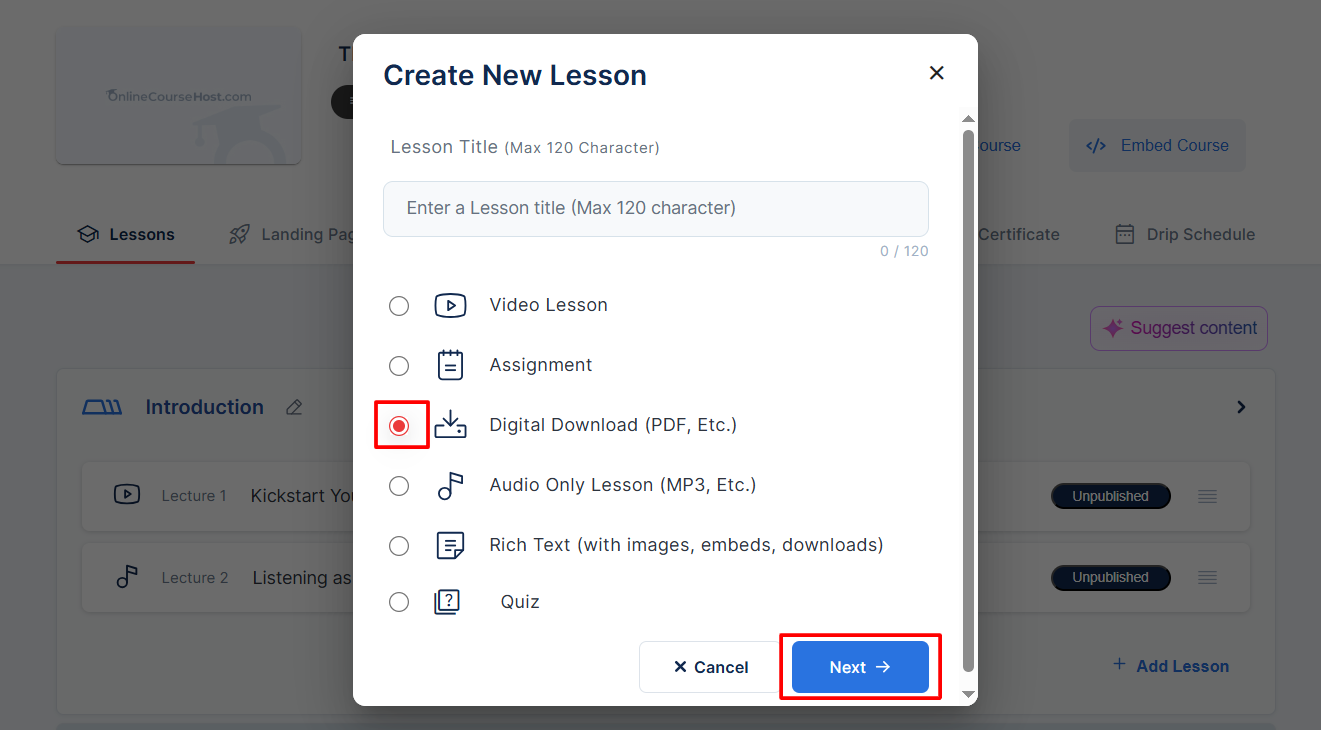
Click the Add Lesson button ⇒ enter a Lesson Title ⇒ tick the Digital Download (PDF, etc.) box ⇒ and click on the Next button.
On the next screen, you'll have the option to refine your lesson title and add a description. This section includes AI support to help enhance your content. To use AI assistance, simply click the AI buttons provided. If you prefer to enter your text, select the Create Manually option.

Step 3: Upload Your File and Customize the Lesson
Click Upload File, and select the file you want to include in the lesson. This could be a PDF, JPG, ZIP, or any other digital file format. You’re not limited to e-books; feel free to upload spreadsheets, templates, or other resources.
Similarly, you can click on the Upload Thumbnail button to optionally add an image, such as a book cover or preview image.
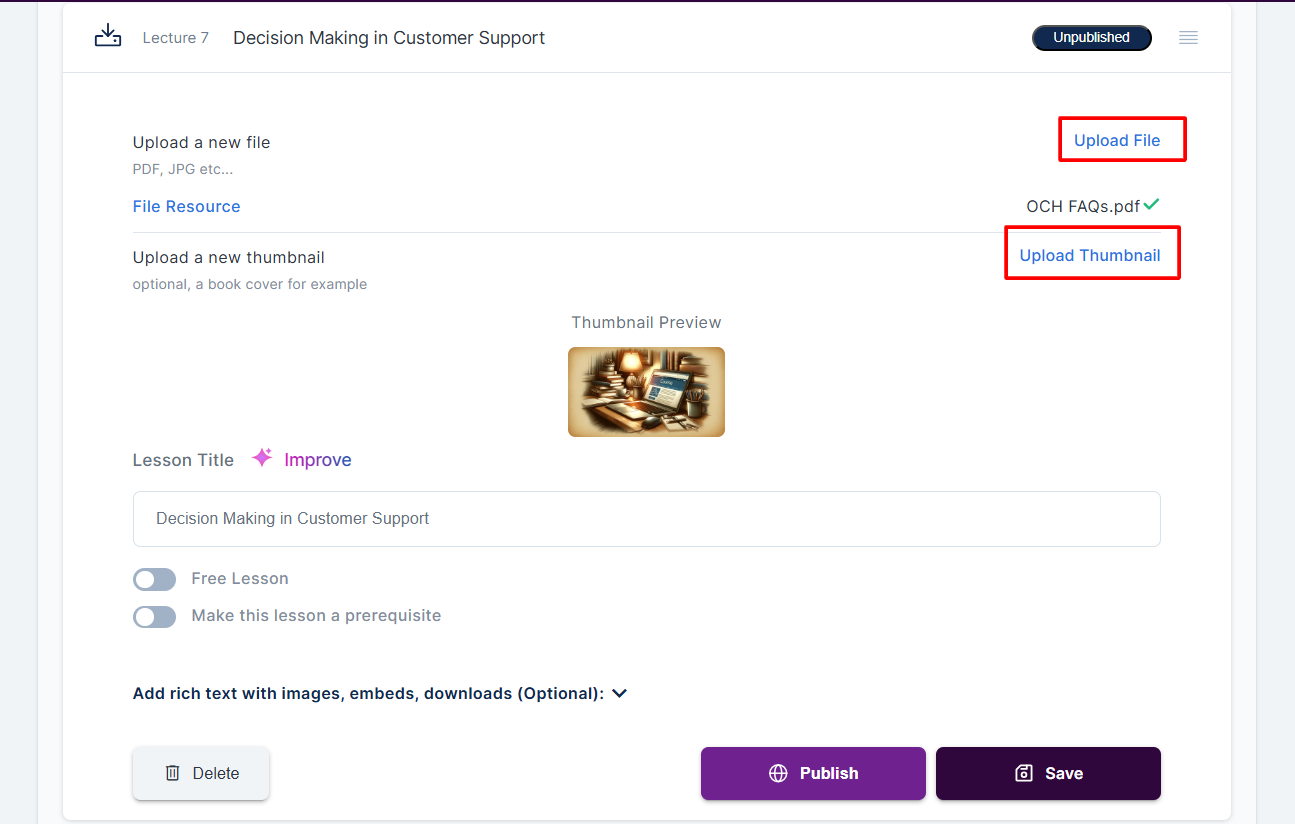
Once you are done with lesson customization and digital uploads, click Save to apply all changes or Publish to publish your lesson.
Step 4: Publish your Course
Move to the Publish tab and verify that all required items are checked. Once everything is complete, scroll down and publish your course.
Step 6: View your course as a student
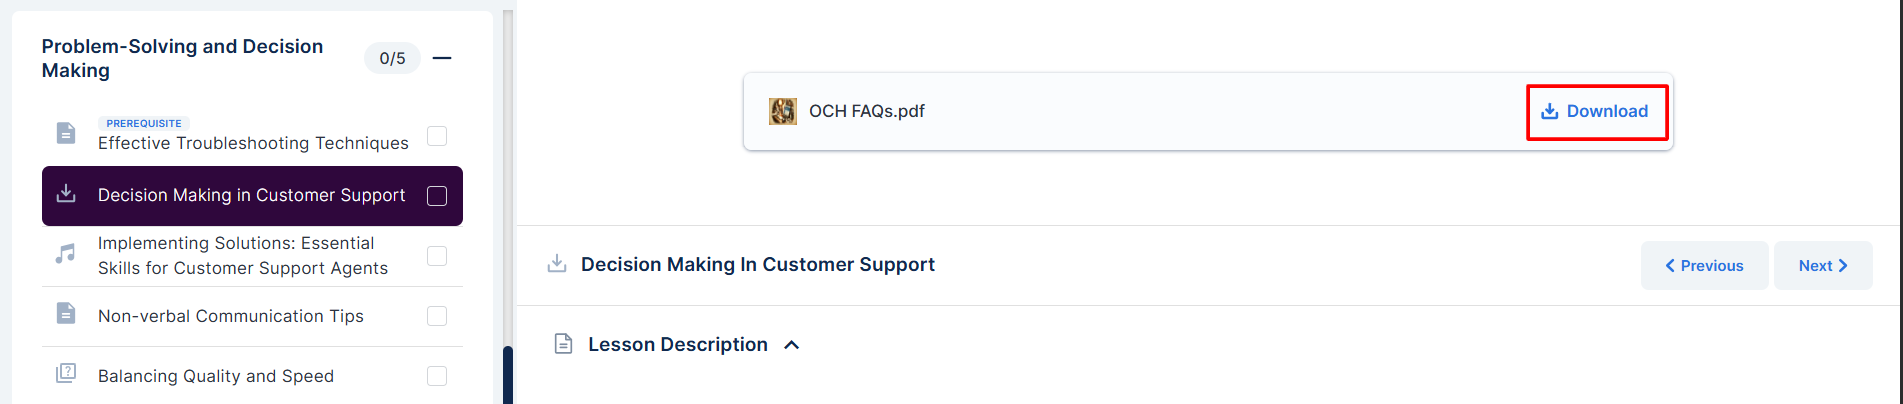
After publishing your resources, they will become available for your students to download.
To view your course as a student, click Courses => View Course, and you will be taken to the course.